| 2019-10-13 | (A) Jeff B | vs | Roy Connelly | | Italian win | Lots of OG for my Italians to cover, so I advanced in three vehicle dust-covered pods. It took me a bit over 2 Turns to reach the foot of the mountains, dishing out as much damage as I took; MG shots pinging off my armor, but I did break two MAs. Thankfully the Indians had already red-chitted by this time. A new challenge was opposing me now though, as moving up the rugged terrain would take some time. I lost my FT tank in the north, and this would put quite a crimp on me wresting BB5 from the 9-1/HMG boys. If it wasn't for my OBA (which I finally found on Turn 4) I never would have been able to do it. Turn 5 was the big breakthrough, with my OBA finally cleaning up the northern mess. Meanwhile in the south my troops ground forward, pushing the Indians into a reverse slope defense. It would only take one more Turn to prove to the Indians that there was no further point in putting up resistance. Not a true desert scenario, as vehicle dust was the only DTO rule in effect. Not bad, but it does seem highly OBA-dependent. |
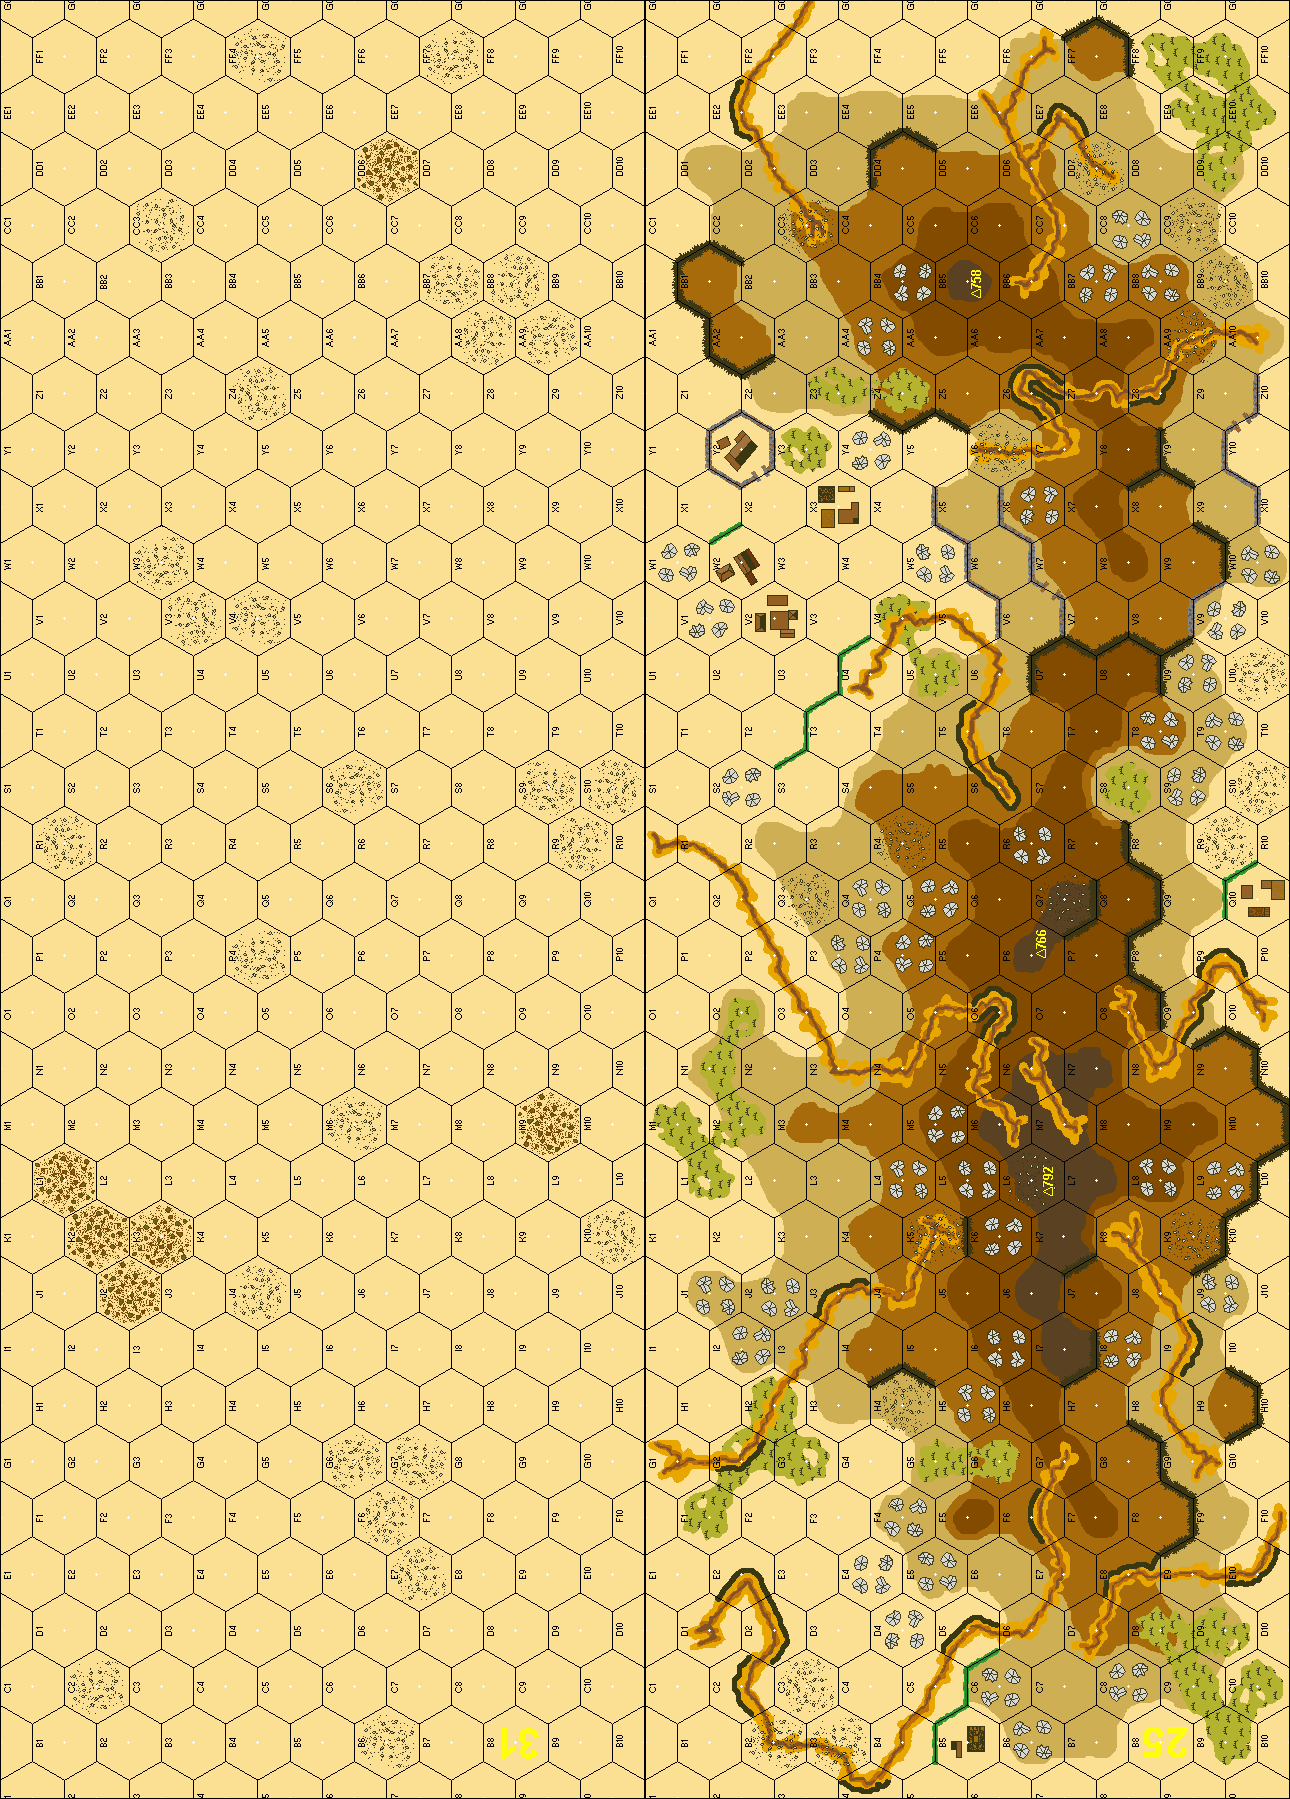
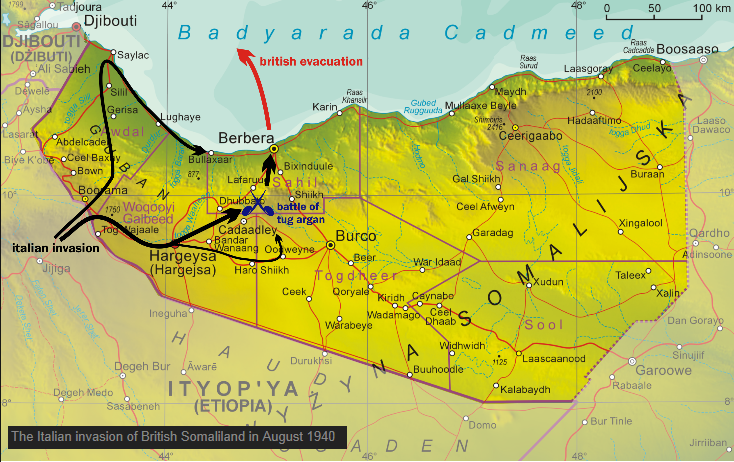
| 2017-12-09 | (A) John Gorkowski | vs | Gary Fortenberry | | Italian win | Italians attack British (Punjabis) in this early war feeding frenzy that feels like an amphibious assault, but takes place in the dry badlands of East Africa. Viewed from the Italian jumping off point, the British position (board 25) is an arid hill mass scarred by deep ravines. It starts on the left with a spire and then, as you pan right, dips into a saddle back before rising up again to form a single ridgeline that dominates the right. The Italians must capture that left end spire (one hex) and just over half of the right-side ridge (six hexes). This whole feature lies just over 400 meters away from the Italian jumping off point across a dishpan flat plain of hard sand dotted with craggy clusters.
My Italians approached in three groups: left, center, and right. On the left, two M11/39 tanks led about seven squads. A half squad carrying a dismantled Brixia (45 mm mortar) shadowed one tank via armored assault until breaking off to set up in a crag from where it started to bombard the British spire. The rest of the infantry and two 7-0s ran across open ground to the cover of crags at the base of the spire. In the center, two teeny-tiny L3/35 tankettes, with bow machine guns only, (leading candidates for worst ever AFV) provided armored assault for my machine gun platoon consisting of my 9-2 leader, two half squads, one HMG, and one MMG. They crossed about 200 meters to reach a crag at mid board where they set up to rake British lines. On the right, my flame throwing tankette “Cracker Jack” and another M11/39 led the assault engineers, four 4-4-7 squads with three demo charges, and about half of my regular infantry force, about nine 3-4-7 squads, forward to the cover of a craggy zone as big as a soccer field.
The Punjabis just watched until the Italians got to within about 200 meters of their forward most positions and then started plinking with small arms, a light mortar, and LMG. The British 9-1 with HMG and manning half squad at the center of the British position (25P6) started splattering rounds on the rocks surrounding the Italian machine gun platoon in the middle of the plain (31P4). None of those fires hit home and a Punjabi ATR missed Cracker Jack. Meanwhile, the British Forward Observer (FO) fumbled radio contact. So, the Italians gained about 200 meters (five hexes) at no cost! Then the situation soon changed.
The British FO finally got through to his battery and then successfully placed harassing fire on the Italian right to clobber about six squads in a 17-hex cluster. That barrage landed smack dab in the middle of the Italian axis of advance. So, the Sons of Nero had to roll to their left, a time consuming and dangerous task as the British rifle and LMG shots started to hit that lateral movement. Lots of cowering – as 2nd line the Punjabis don’t get the usual exemption – spared the Italians from total destruction. But that modest British mortar did score a critical hit on the Italian machine gun platoon to kill the 9-2 and break his infantry.
Italian artillery and British ATRs provided some relief. Italian guns bombarded the British HMG to begin a cycle of breaking, pinning, and hindering that kept that HMG out of action for several turns. British ATRs lived up to their reputation by putting on a light show and then malfunctioning. So, my tankettes strutted around in their thin skin with impunity.
By about turn four, the Romans had reached the base of the British hill, but lost at least half their squads in the process. Broken half squads that would never rally littered the Italian right rear. On the other hand, British losses were trivial. A single Punjabi 4-4-7 at the base of the British position supported by fire from the ridge line barred further Italian advance uphill. So, Cracker Jack rolled forward with its 32-firepower flame thrower sporting a very safe B11. Nonetheless, I rolled boxcars on my pointblank shot to bust my precious blow torch and unleash two turns of floundering around that lone Punjabi 4-4-7. An Italian assault engineer, complete with demo charge, got adjacent but then pinned. A few more squads broke under fire from the ridge line. The M11/39 fired wide and then broke its gun – a total mess.
Over on the left, my Italian troops fared better. They suffered some breaks to rifle and machine gun fires, and broke their own mortar, but made slow steady progress up the spire against three British squads who, one by one, buckled under the steady plinking of Italians small arms. An Italian M11/39 was first to reach the spire’s tip, but suffered immobilization at the hands of British troops entrenched there. Nonetheless, that in-hex AFV contained British fires so the Roman rifles could circle round and then advance into close combat. After two turns, the Italians finally finished the melee to capture the spire around turn six. Those victors then raced across the saddle back dip toward the long ridge line.
The Italian right finally defeated that one obstinate 4-4-7 to push up hill. But the relentless dribble of Punjabi rifle rounds made progress slow and rebuffed those who tried to charge. In the center, Italian loss of battery access freed the British HMG position. It scored a few morale checks before Italian tankettes shut it down with a sleaze freeze. That pesky tankette then survived a few turns of melee to again keep the British 9-1 and HMG busy. Meanwhile, an Italian leader from the right ran back to take charge of the shattered machine gun platoon once led by the now dead 9-2. That leader then started a prepfire-advance-defensive fire routine that kept the British ridge line under stead pressure. And, a couple of Italian assault engineers self-rallied to recharge the push on the right.
All that back and forth finally took a toll on the Punjabis. They had only a few squads left on the ridge line. A key leader who had fled behind it for protection in order to rally flubbed his rolls for two or three turns. Another leader arrived to rally the laggard, but died with boxcars. The Romans managed to get two squads on the ridge crest. One hunkered down in a foxhole to limit British movement while the other hopped between ravines to capture hexes; he survived a few shots from the British 9-1 and HMG thanks to the burning Italian wreck that hindered their vision.
During their last movement phase, the Punjabis counter attacked with two squads to recapture critical ridge hexes. They survived dangerous shots (6 down 1 and 6 up 1) from ridge top Italians, engaged one defender in melee, and even spawned a hero! But then, with one player turn left to go, the Roman HMG down there on the plain went on a rate tear. By now it had inched forward, one advance phase at a time, to within 12 hexes (normal range) of the ridge line. I think the 9-1 and team managed something like seven shots in one fire phase to sweep most of the Punjabis off the crest. That ended it. With no British movement remaining, the Italians held five ridge hexes and could use their end-of-game advance phase to take two more so the Brits admitted defeat. So ended another carboard epic.
|