Climax at Nijmegen Bridge WTO (id:#56527)
Prior Publication: SL 34, ASL Digest # 3.07, DallasCon 93
Nijmegen, The Netherlands
1944-09-20 (51 others)
25: Gavin's Gamble (ASL 3 - Yanks)
ABtF07: Among the Bravest (HASL 6 - A Bridge Too Far)
ABtF08: God Save the King! (HASL 6 - A Bridge Too Far)
TB 6: Grinding Forward (Arnhem: The Third Bridge (1st Ed.))
TB 7: Damn and Blast (Arnhem: The Third Bridge (1st Ed.))
TB 8: The End? (Arnhem: The Third Bridge (1st Ed.))
CH 51: The Sonnenburg Hotel (Critical Hit # 3.1)
Z23: Setting the Woods on Fire (Rout Report # 5.2)
GSTK 2: House G (God Save the King)
GSTK 6: Block by Bloody Block (God Save the King)
RBF 8: Germeter by Meter (Recon by Fire! #1)
TOT 40: Ring of Fire (Time on Target # 3)
O74.1: Running a Mook (On All Fronts # 74)
SP131: Pocket Panzers (Schwerpunkt #11)
TAC9: Stutzpunkt Lezongar (Tactiques # 1)
SC12: Climax at Nijmegen Bridge (ASL Digest # 3.07)
NEV1: Making a Break for It (Nor'easter V)
SP141: Broken Beek (Schwerpunkt #12)
S23: Monty's Gamble (ASL Starter Kit #3)
3: Piercing the Veil (Witches Cauldron: Oosterbeek Perimeter)
4: Stand and Die (Witches Cauldron: Oosterbeek Perimeter)
5: Till the Woods Run Red (Witches Cauldron: Oosterbeek Perimeter)
WO04: I Don't Like Retreating (Winter Offensive Bonus Pack 2011)
ATB6: Grinding Forward (Arnhem: The Third Bridge (4th Ed.))
ATB7: Damn and Blast (Arnhem: The Third Bridge (4th Ed.))
ATB8: The End of the 2nd Battalion (Arnhem: The Third Bridge (4th Ed.))
FT173: A Misstep in Lorraine (From The Cellar Pack # 7)
J155: It's Hardly Fair (ASL Journal #10)
BBD # 3: Piercing The Veil (Brave But Doomed)
BBD # 4: Stand And Die (Brave But Doomed)
BBD # 5: Until The Woods Run Red (Brave But Doomed)
OO11: Hill 235 (Operation Olive - Gothic Line 1944)
OO13: Counter-Attack at Montecieco (Operation Olive - Gothic Line 1944)
OO14: Back and Forth (Operation Olive - Gothic Line 1944)
OO15: The Charge of the Queen's Bays (Operation Olive - Gothic Line 1944)
OO16: Riposte (Operation Olive - Gothic Line 1944)
AL01: It's Hardly Fair (Fanatic Enterprises: Internet)
YASL#7: Making a Break for It (Nor'easter XX)
25: Gavin's Gamble (ASL 3a - Yanks (2nd Edition))
GS10K: Gunapalooza (ASLOK 2012)
TD 2: Ommeray: Duel of Commandos (Trench of Death #1)
JF 9: Among the Bravest of the Brave (Jitter Fire III)
S70: A Sideshow Affair (ASL Starter Kit #4)
S87: Straight and Fast (ASL Starter Kit Bonus Pack #2)
DTF-16: Panther Cull (Not One Step Back)
GJ101: Van Lennepweg’s Garden (Grumble Jones)
GJ104: Brothers at the Crossroad (Grumble Jones)
CH 51: The Sonnenburg Hotel (Critical Hit #3.1 2022 Reprint)
J210: Moment of Truth (ASL Journal #13)
292: Four Stars of Valor (ASL 16 - Twilight of the Reich)
FT INOR19: “Pointed Stone” Broken (Inor Players Guide)
Designer: Adaptation: Pat Ryan
Starter kit scenario?: Deluxe scenario?:
Balance:
American / BritishGerman (SS)
Overview:
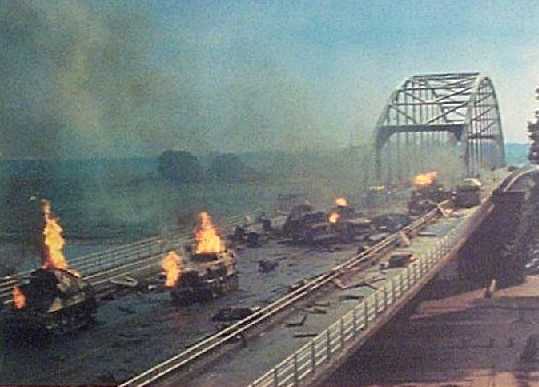
During Operation Market Garden, the road bridge in Nijmegen was the second of three bridges which had to be secured in order to relieve the British 1st Airborne and throw a force across the Rhine. A task force comprised of a mixture of U.S. paratroopers and the British armored relief column was assigned to take it. They were to cross the road bridge at any cost and link up with the paratroopers who were fighting their way toward the north end of the bridge.Attacker: American / British (2nd Company, 1st Grenadier Guards and Companies E and F, 2nd Battalion 505th PIR/Company I, 3rd Battalion, 504th PIR/Troop #1, 3rd Squadron, 2nd Grenadier Guards)
Defender: German (SS) (Nijmegan Garrison and elements of 2nd Battalion, 21st SS Panzer Grenadier Regiment)
9.5 turns
Players: 99 OBA: American / British Night: No| Unit Counts: |
| Squads: A:20.0 D:15.0 |
| AFVs: A:4 Sherman VC(a) Sherman V(a) x 3 |
| AFVs: D:2 StuG IIIG (L) Marder II |
| Guns: A:0 OML 2-in. Mortar Airborne D:4 2cm FlaK 30 x 2 7.5cm PaK 40 8.8cm FlaK 18 |
| Misc Rules: | +1 LV darkness hindrance after turn 8. US = Stealthy. Brit/Germ AFVs = Elite |
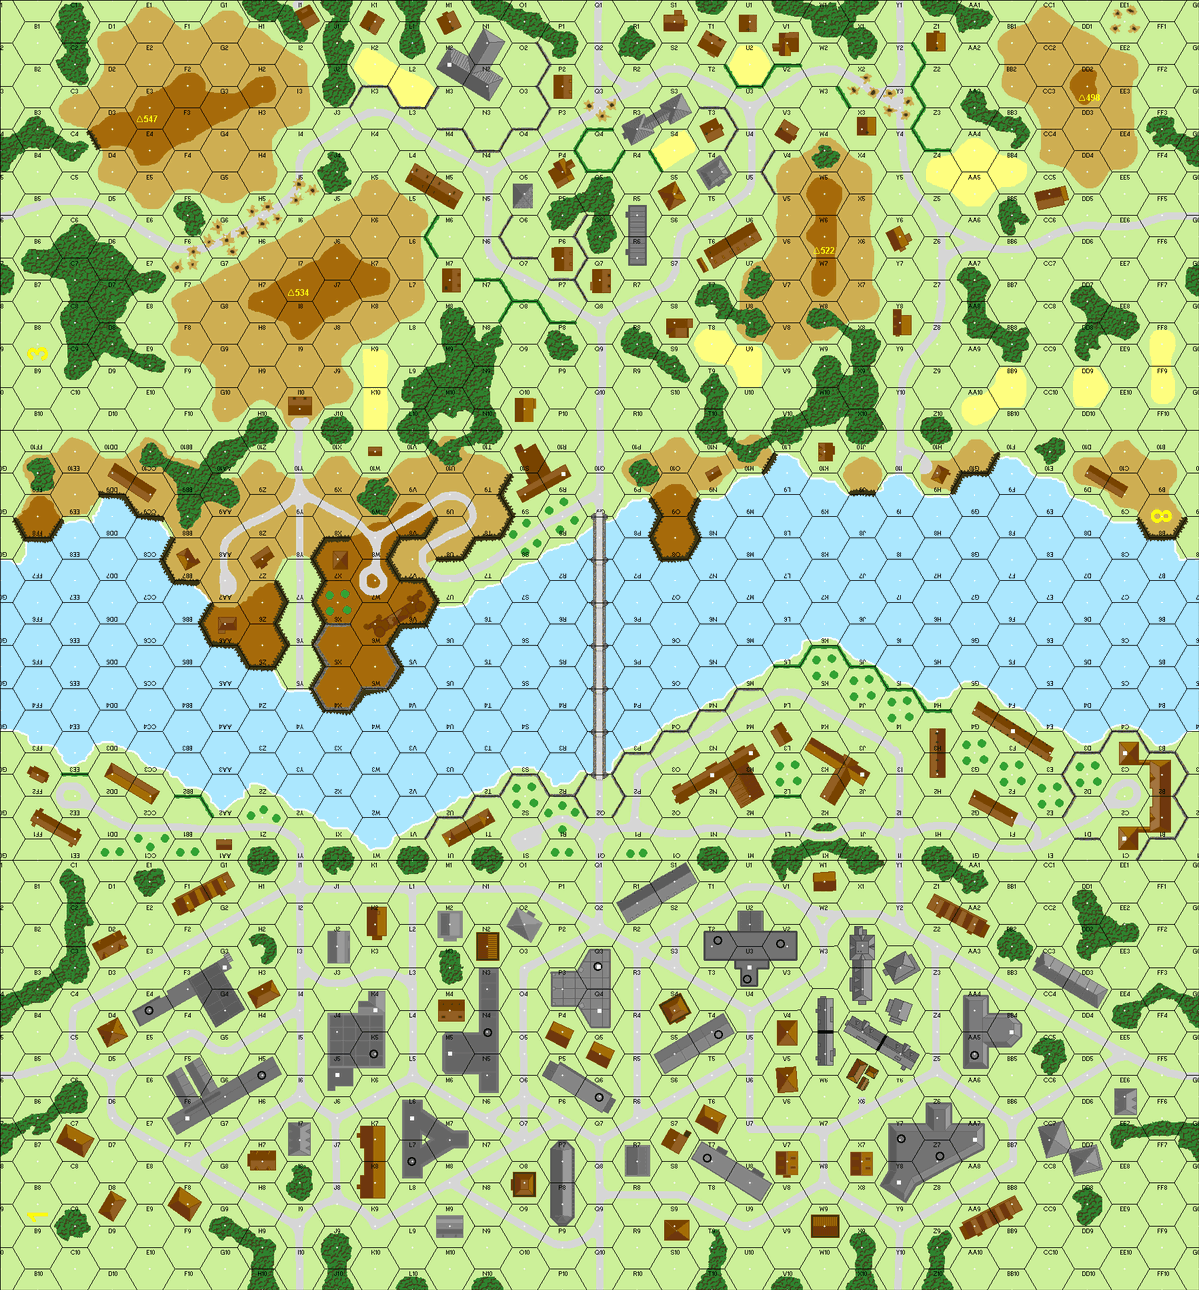
| Map Board(s): |

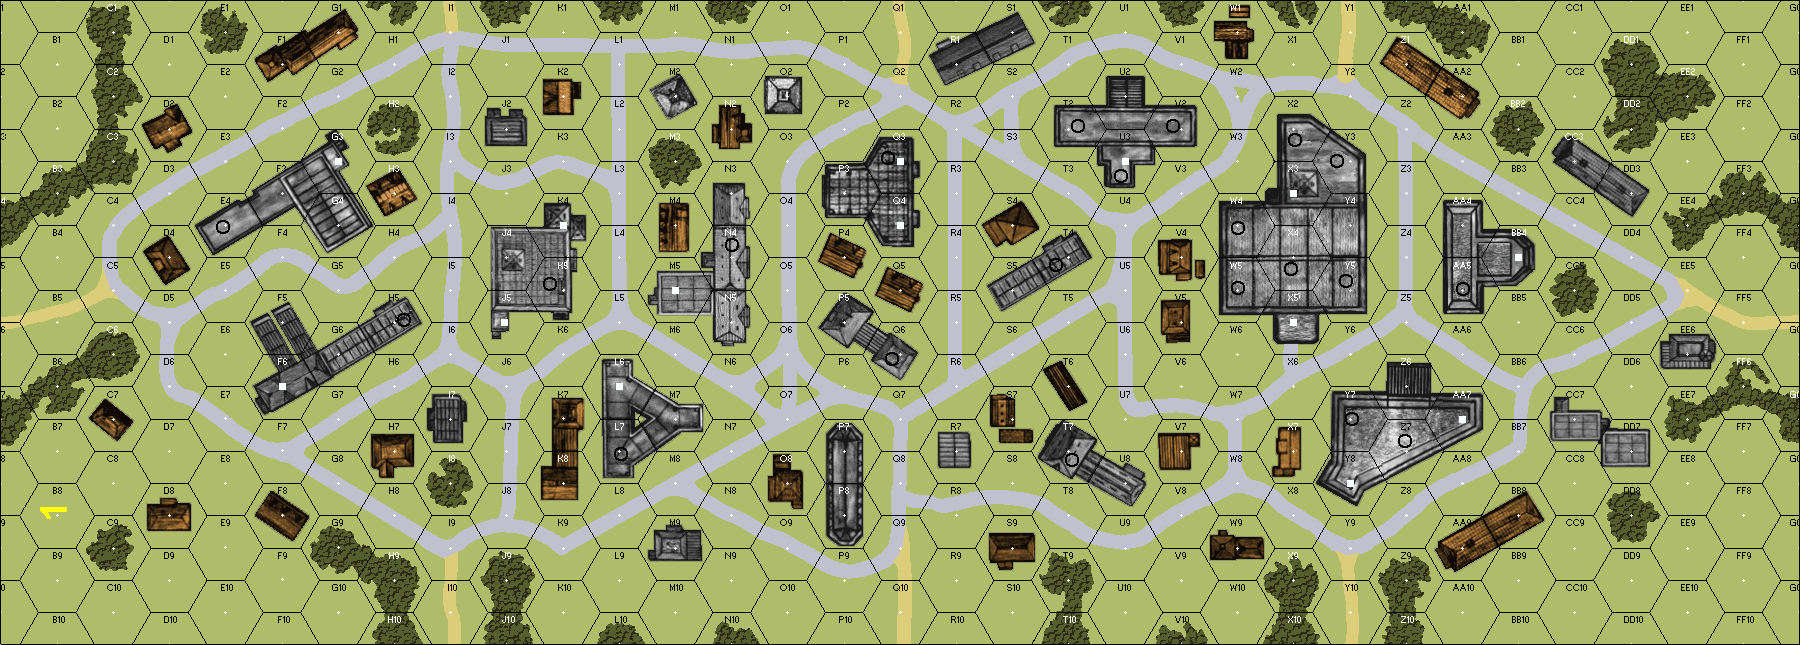
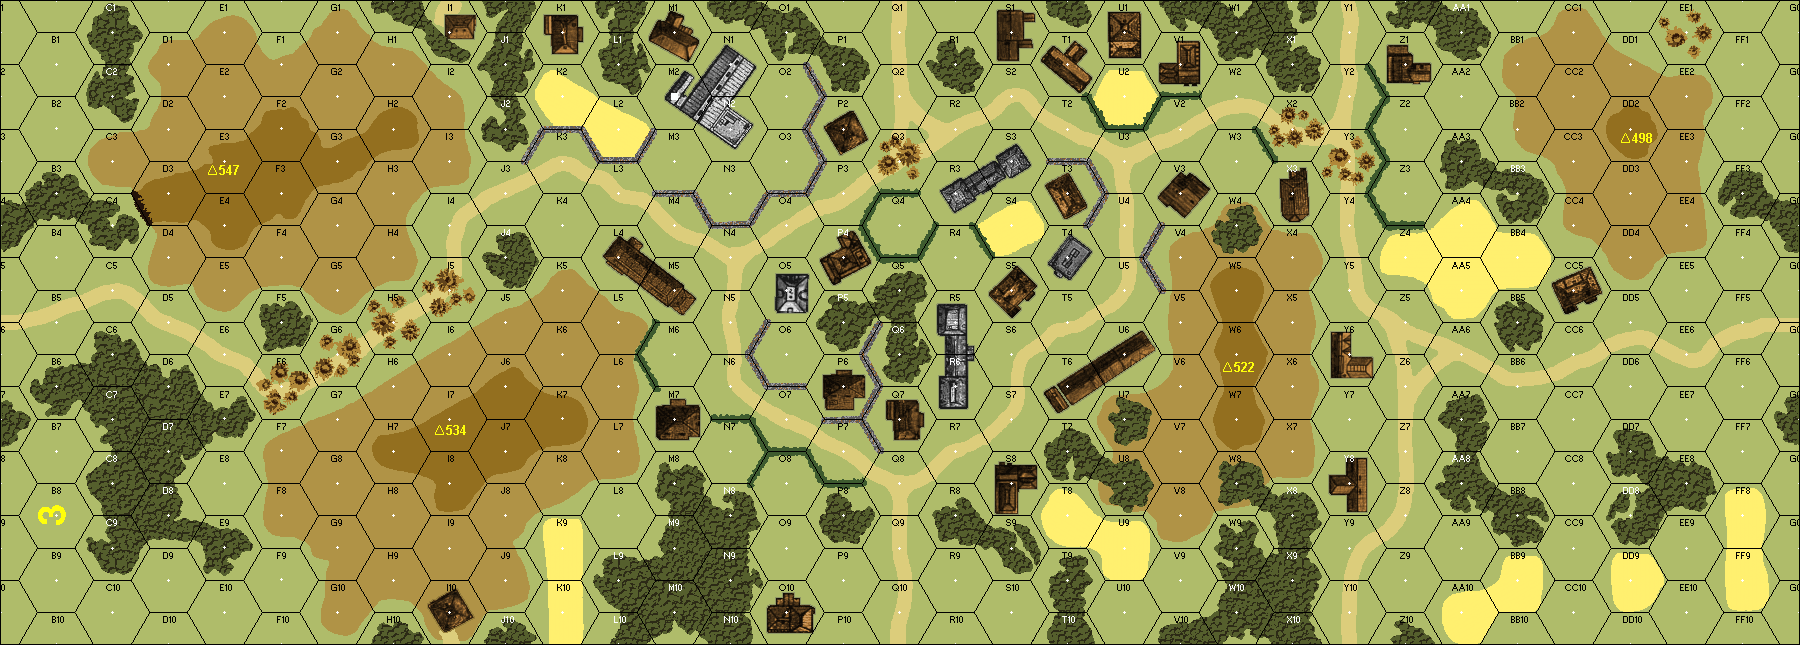
| Overlays: | X7 | X14 | X18 |
Errata (source)
Players wanting to play this game/Request a match:
Scenario info
Last Played:
View all or balance report
| Action | Date |
|---|---|
| nicotum Added a playing | 2026-04-15 21:16:16 |
| jgarlic79@gmail.com Added a playing | 2025-08-02 16:58:54 |
| asloser Added a playing | 2024-09-24 15:57:57 |
| Pte Parts Linked the scenario to ROAR | 2024-07-15 00:05:14 |
| Viking_CTO Added a playing | 2023-10-08 01:23:19 |
| File | Description | User | Views |
|---|---|---|---|
| (abtfbridgemassacre.jpg) | Image | hoxson1 | 1855 |
| (allied-ss new.png) | Image | hoxson1 | 1524 |
| (u04.gif) | Map Image | Twirling | 2163 |
| Description | Uploaded by |
|---|
| Title | Author | Date |
|---|
| Description | Uploaded by |
|---|
Quick Map View
Location
Not found
Images

| Statistics: | ||
| Avg Rating: 6.17 | Votes: 12 | Views: | 10226 |
| To-Play list count: | 2 | |
| Estimated Play time: | 11.2 hours | |
| Recorded Games: | 11 | |
| Archive recorded plays: | ||
| American / British | 2 | |
| German (SS) | 9 | |
| Drawn: | 0 | |
| ROAR Data: (as of today) Climax at Nijmegen Bridge [Confirmed] |
| [A] German | 28 |
| [D] American/British | 13 |