Luzon Lunatics PTO (id:#57318)
Baguio, Luzon
1945-03-11 (1 other)
Designer: Glenn Houseman
Starter kit scenario?: Deluxe scenario?:
Balance:
JapaneseAmerican
Overview:
General Yamashita's 14th Area Army Headquarters at Baguio was hemmed in by American units from the 43rd Infantry Division that were determined to nullify the Japanese forces in northern Luzon, as the battle for Manila raged down south. Occasionally, small attack groups would probe the American line. One such group prepared to attack an isolated outpost utilizing a few rare self-propelled artillery pieces.Attacker: Japanese (14th Army HQ Defense Force)
Defender: American (43rd Infantry Division)
4.5 turns
Players: 2 OBA: None Night: No| Unit Counts: |
| Squads: A:10.0 D:7.5 |
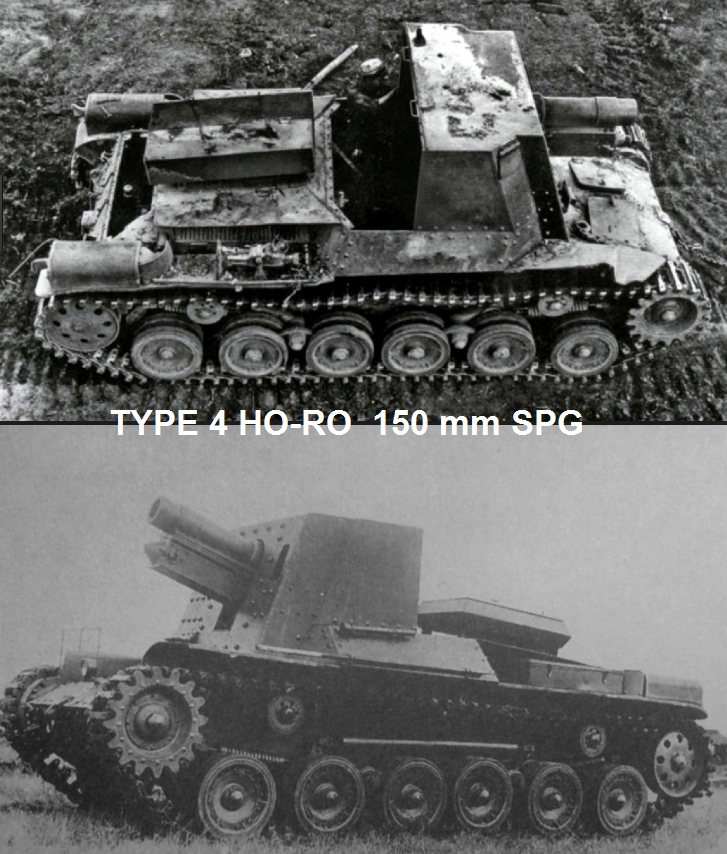
| AFVs: A:3 Type 4 HO-RO x 2 Type 1 HO-NI I |
| AFVs: D:1 M20 |
| Guns: A:0 Type 89 Heavy Grenade-Launcher D:0 M2 60mm Mortar |
| Misc Rules: | PTO (G.1), LJ (G2.1) Exc: Roads exist. |
| Map Board(s): |
| Overlays: | X28 |
Errata (source)
Players wanting to play this game/Request a match:
Scenario info
Last Played:
View all or balance report
| Action | Date |
|---|---|
| von Marwitz Uploaded the Board image | 2026-06-12 11:07:30 |
| von Marwitz Uploaded an Image | 2026-06-12 11:06:34 |
| von Marwitz Uploaded a VASL file | 2026-06-11 19:52:19 |
| von Marwitz Uploaded an Image | 2026-06-11 19:48:45 |
| sherersc Rated the scenario | 2026-01-04 03:41:27 |
| File | Description | User | Views |
|---|---|---|---|
| VASL Scenario Setup (HP-22 Luzon Lunatics v667.vsav) | VASL Setup | Turuk | 1205 |
| (HP-22 Luzon Lunatics v674-beta1 Scenario Archive.vsav) | VASL Setup | von Marwitz | 32 |
| (!jap-usa.png) | Image | hoxson1 | 1649 |
| (type 4 ho-ro SPG 150mm.png) | Image | hoxson1 | 1845 |
| (HP-22 Luzon Lunatics v674-beta1 Scenario Picture.jpg) | Image | von Marwitz | 29 |
| (luzon lunatics map.png) | Map Image | hoxson1 | 1494 |
| (HP-22 Luzon Lunatics v674-beta1 Scenario Archive.jpg) | Map Image | von Marwitz | 26 |
| Description | Uploaded by |
|---|
| Title | Author | Date |
|---|
| Description | Uploaded by |
|---|
Quick Map View

Location
Images


| Statistics: | ||
| Avg Rating: 6.55 | Votes: 11 | Views: | 5598 |
| To-Play list count: | 0 | |
| Estimated Play time: | 2.8 hours | |
| Recorded Games: | 6 | |
| Archive recorded plays: | ||
| Japanese | 3 | |
| American | 3 | |
| Drawn: | 0 | |
| ROAR Data: (as of today) Luzon Lunatics [Log in to Confirm or Edit] |
| [A] American | 4 |
| [D] Japanese | 7 |