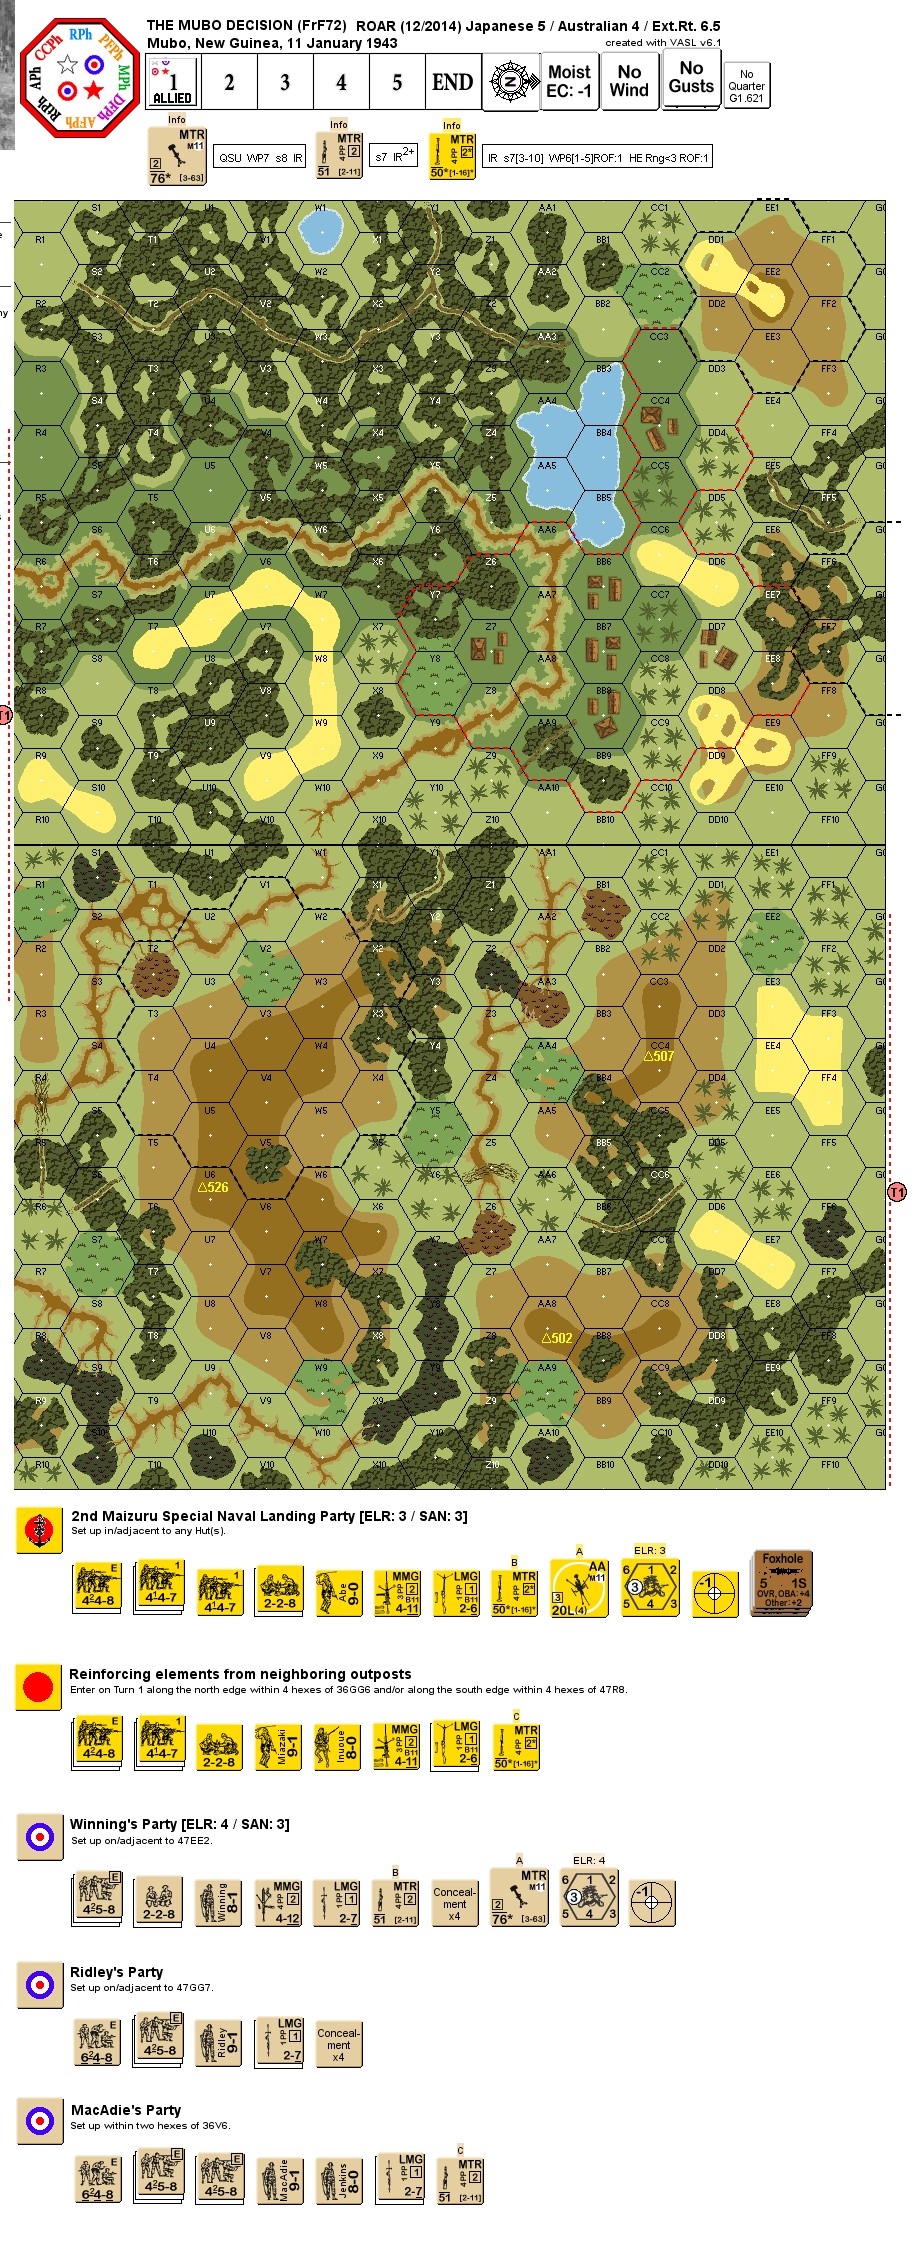
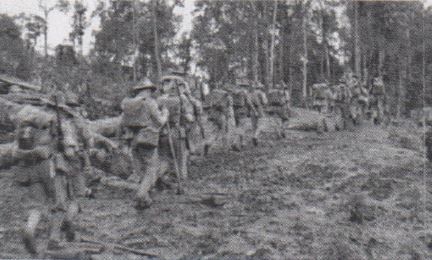
In early 1943, the strategic situation in central New Guinea remained unresolved. The Japanese build-up created an expectation that the Japanese would move first. To counter these expectations, Australian commander Lt. Col. Fleay mustered 300 Australian commandos and launched a raid against the key Japanese outpost at Mubo. This village was located approximately 20 kilometers from the Japanese-held coastal village of Salamaua, the scene of an earlier successful ANZAC raid. Fleay sought to surround Mubo and then launch an attack. Australian commandos from the 2/5th and 2/7th Independent Companies were broken into five parties and after a long march through jungle and mountainous terrain sought to attack Mubo from three directions. A reinforced company of naval troops from the 2nd Maizuru SNLP protected this outpost and its neighboring airfield.
Attacker: Australian (Winning's Party | Ridley's Party | MacAdie's Party)
Defender: Japanese (2nd Maizuru Special Naval Landing Party)
5 turns
Players: 2 OBA: None Night: No
Unit Counts:
Squads: A:13.5 D:14.0
AFVs: A:0
AFVs: D:0
Guns: A:1
OML 3-in. Mortar OML 2-in. Mortar x 2
D:1
Type 98 High-Angle Machine Cannon Type 89 Heavy Grenade-Launcher x 2
I dropped some smoke on the AA gun down in the village, but he was easily able to push it to the net hut, where my mortar reacquired it in its sight. My plan was to contest the Jap reinforcements strongly, and thus I did. Some of them braved the northern approach (albeit slowly), while the rest sought a safer but slower route through the western jungle. This left me with a rather small force to try and squeeze him in the middle until the rest of my men could reposition. CC was not an appealing prospect to me and, even though we mostly traded bodies for the first couple turns, I felt I got the raw deal. I think we may have forgotten I was stealthy due to being ANZAC, and it probably would've made a difference in the final result. By the end of Turn 2 I had captured two huts, and this would be a stalemate for the next couple turns, despite a bloody Turn 3 for the Japs (losing four squads to my two). Turn 4 saw me get the sharp end of the stick, losing three squads to his half. Turn 5 finally saw me get my requisite four huts, but I would need to hold them all. I did a nice job of holding him off for the most part, but we conducted his best CC first (a 3:2 affair) that saw him prevail. Not my favorite type of scenario by any means, as most of the game was simply who got luckiest in PB shooting and CCs.
2021-11-18
(A) Paul Legg
vs
Steve Cook
Australian win
Bounding Fire Blackpool 2021 - This was played with the Australian balance as we both wanted the Japanese. The Australians start concealed and kept that advantage to assault the huts through the palm trees. On the other hand the onboard japanese were unable to gain ? and were pounded by the large mortar on the hill.
2021-11-16
(A) Nate Gregg
vs
Chris Gregg
Japanese win
2021-11-16
(D) Chris Gregg
vs
Nate Gregg
Japanese win
[Imported from ROAR]
2021-11-09
(D) Nate Gregg
vs
Chris Gregg
Australian win
2021-11-09
(A) Chris Gregg
vs
Nate Gregg
Australian win
[Imported from ROAR]
2021-03-26
(D) Nate Gregg
vs
Martin Vicca
Australian win
Played live on a Friday eve (GMT) with Martin Vicca and friends (via Skype).
2021-02-08
(D) Simon Staniforth
vs
Japanese win
Kept the Japanese reinforcements together rather than splitting and used their critical mass to push back into the village denying the Aussies the last hut in the final turn
2021-01-25
(A) Simon Staniforth
vs
Australian win
A steady squeeze from the Australian forces, lost a couple of leaders early but generally able to rally back the brokies and have enough force to hold off the final Japanese attempt to retake huts. Japanese not helped T3 when a leader goes berserk taking 2 squads and the crew with him only to all be KIA / broken to a 36-1 shot
2020-08-21
(D) Tuomo Lukkari
vs
Tommi Kangasmaa
Japanese win
[Imported from ROAR]
2019-03-06
(D) Stephen dedier
vs
Holt, Jim
Japanese win
The Aussies had a good first turn taking out a couple of Japanese HS and flanking the hill position on the South side threatening the Japanese. But they also malfed the big mortar and lost smoke on the small one. All the Japanese reinforcements came on the South as close to the action as possible. I sacrificed a squad and leader (didn't think they would both die) but broke concealment on the Aussies that had flanked me and got behind them. That eventually cost the Aussies 3 squads and a leader killing the advance from that direction. Things started getting tight and the remaining 2 Japanese leaders both rolled 12 on MC killing themselves leaving me with none but with the Japanese striping and reducing instead of breaking I kept close contact. On turn 3 Jim pushed up to force the issue taking a second building but putting his troops at risk. The Japanese took casualties but moved into 3 CC getting 2 Ambush and killing 2.5 more squads without loss. At this point Jim conceded. The Japanese were clustered in the main camp and held high ground on East and West ends making approach but the small forces on either end impossible. The only large Aussie force was on the single hut over the gulley with 2 squads (two others broken and a broken leader) but still needed to get a striped squad out of that hut and deal with the AA gun beside them. Japanese took a lot of casualties in the push of the reinforcements but they got into the battle and made the difference.
2018-08-04
(D) nathan wegener
vs
Scott Martin
Japanese win
Tense smash mouth struggle. Looks tough on Japs but they have the tools to hang on to huts. I was able to distribute enough firepower to delay and hold on.
2017-04-07
(D) Jeremy Busby
vs
Wauford Hayes
Japanese win
2016-03-27
(A) Eric Partizan Eric
vs
Japanese win
2015-10-10
(A) Andy Hershey
vs
Hank Wit
Australian win
[Imported from ROAR]
2015-05-15
(A) Michael Rodgers
vs
Andy Beaton
Australian win
Australians slowly moved toward the village aided by decent amounts of smoke and WP. Japanese entered reinforcements from north and south. Lots of CC and casualties. After four turns, the Aussies held the village and there were not enough Japanese to take it back.
2015-05-15
(D) Andy Beaton
vs
Michael Rodgers
Australian win
CASLO 2015
2015-05-15
(D) Will Willow
vs
R. Yeates
Australian win
ASL OPEN
2015-05-15
(D) James Rimmer
vs
Rick White
Australian win
[Imported from ROAR]
2015-04-06
(D) Dave Mareske
vs
Mark Fischer
Japanese win
2015-02-22
(D) Paolo Cariolato
vs
Andrea Pagni
Australian win
2015-02-06
(A) Richard Jenulis
vs
Al Davis
Australian win
NWASL Championship 2015
2015-01-07
(D) X von Marwitz
vs
Martin Mayers
Australian win
Absolute unmitigated disaster for the Japanese. It was all but over the end of Japanese turn 2. Central stack's leader went berserk and took everyone with him. Still, they rolled so bad that they lost three units despite Morale 10. Two moves of the reinforcement force ran into enemy attacks with a DR of 3 each for some KIAs. Then 3 of four H-t-H's failed miserably. The fourth killed an Australian HS, a 9-1 and 8-1 leader but this was not suffcient to turn the tide after losing 6.5 squad-equivalents and one Japanese leader in the last half-turn.
2014-11-07
(D) Randy Strader
vs
Brian Roundhill
Australian win
Difficult to determine where to put the Japanese AA gun. As above, it got smoked in the first turn by the Aussies, rendering it useless for nearly half the scenario. Bring Jap reinforcements in as close to Aussies as possible, as there is little time to beat back their defense.
2014-10-27
(D) Michael Rodgers
vs
Jean-Pierre Raymond
Japanese win
I had the Australians. JP chose to set up close to the the Australians for maximum deterrence, but I think it backfired on him because my Australians were able to move adjacent and stay concealed. I was able to smoke the AA gun on the first turn and eliminate the crew in CC. I eliminated a squad in CC as well and had another in melee and I had taken the one hut that he had left undefended. He chose to bring the Japanese reinforcements on the south side, because I had a stronger force defending the north entrance. On my turn 2, he had a Japanese stack containing 9-1, 2x448, 2xLMG, crew, MMG opposite a 50mm light MTR that I had positioned to interdict the reinforcements. I took a shot instead of skulking and scored a CH. Then, I rolled another snake-eyes on the effects; 2KIA. Japanese stack is now 2x348, 2xLMG and unpossessed MMG. JP threw in the towel at that point. The losses, combined with his incorrect setup (he had setup using HIP, which was NA by SSR; he simply put the HIP on board, rather than re-do his setup), led to the early concession.
2014-10-06
(D) Kevin Killeen
vs
Wai-Kwang Wong
Australian win
ASLOK. Think their might be a learning curve for the Japanese. Fun though.