The Mighty Have Fallen PTO (id:#61645)
Baliuag, Philippines
1941-12-31 (7 others)
A 92: Highway 5 (AH:ASL Annual `96)
J11: In the Old Tradition (ASL Journal # 1)
PTO1-4: Battle at Baliuag (Total Pacific Theatre Pack 1)
DP #4: Battle at Baliuag (Digger Pack I)
D22: In the Old Tradition (Deluxe Advanced Squad Leader)
MMP02: In the Old Tradition (MMP News)
FT329: Gaining time at Baliuag (Franc-Tireur #16)
J11: In the Old Tradition (ASL Journal # 1)
PTO1-4: Battle at Baliuag (Total Pacific Theatre Pack 1)
DP #4: Battle at Baliuag (Digger Pack I)
D22: In the Old Tradition (Deluxe Advanced Squad Leader)
MMP02: In the Old Tradition (MMP News)
FT329: Gaining time at Baliuag (Franc-Tireur #16)
Designer: Hugh Downing
Starter kit scenario?: Deluxe scenario?:
Balance:
JapaneseAmerican
Overview:
The commander of the Japanese 48th Division, General Tsuchibashi ordered a small task force of infantry and armor to remove the American defenses around the Calumpit bridges. The unit defending this area was General Jones’ U.S. South Luzon Force. General Jones ordered the withdraw of the defending units. The 71st Infantry Division PA had already withdrawn and the 91st Infantry Division PA was executing a fighting withdraw when the main thrust of the Japanese attack hit them. They received armor support from the 192nd Tank Battalion and some 75mm self-propelled mount, halftracks. Through heavy fighting, with tank on tank combat in the streets, the U.S. forces were able to withdraw, thanks to the actions of the rear guard.Attacker: Japanese (Elements I/2nd Formosa Infantry Regt. & 7th Tank Regt., 48th Division)
Defender: American (Elements 91st Infantry Division (PA) & 192nd Tank Battalion)
5.5 turns
Players: 2 OBA: None Night: No| Unit Counts: |
| Squads: A:14.0 D:12.0 |
| AFVs: A:6 Type 89B CHI-RO x 2 Type 95 HA-GO x 4 |
| AFVs: D:5 M3 LT x 3 M3 GMC x 2 |
| Guns: A:0 Type 89 Heavy Grenade-Launcher D:0 |
| Misc Rules: | PTO, LJ. (Exc: roads and bridge exist). A: may generate 4 T-H or DC Heroes total |
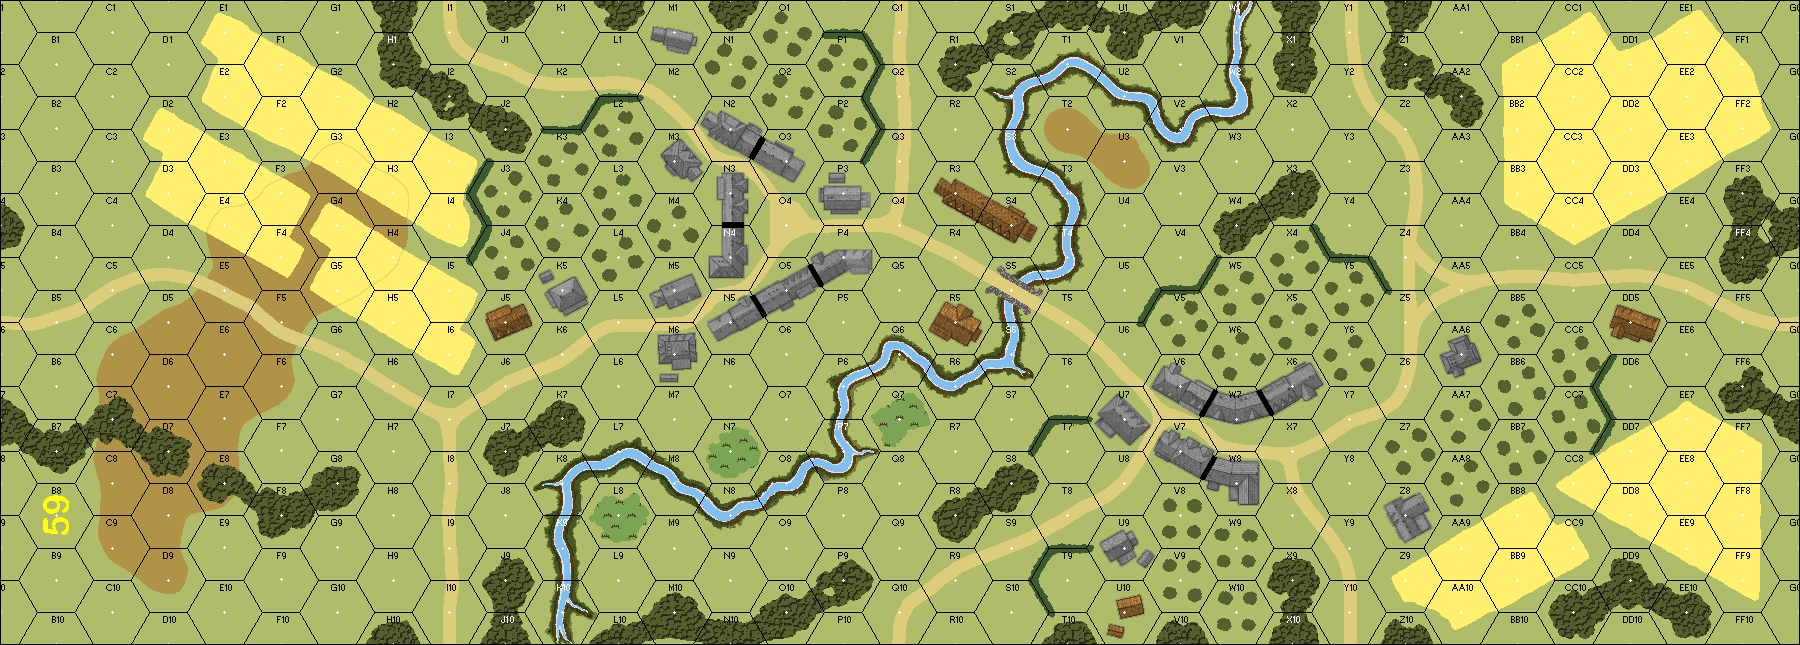
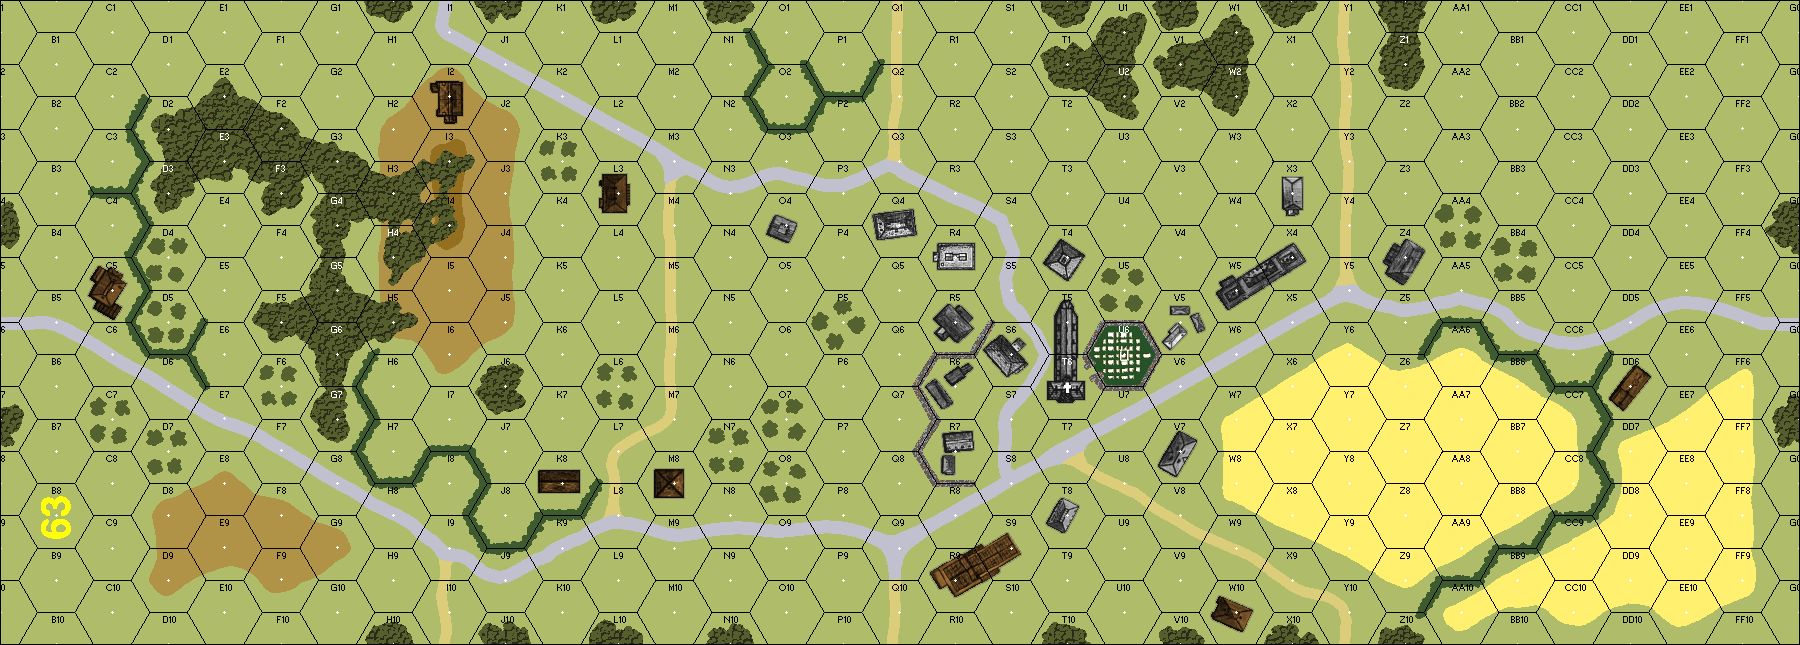
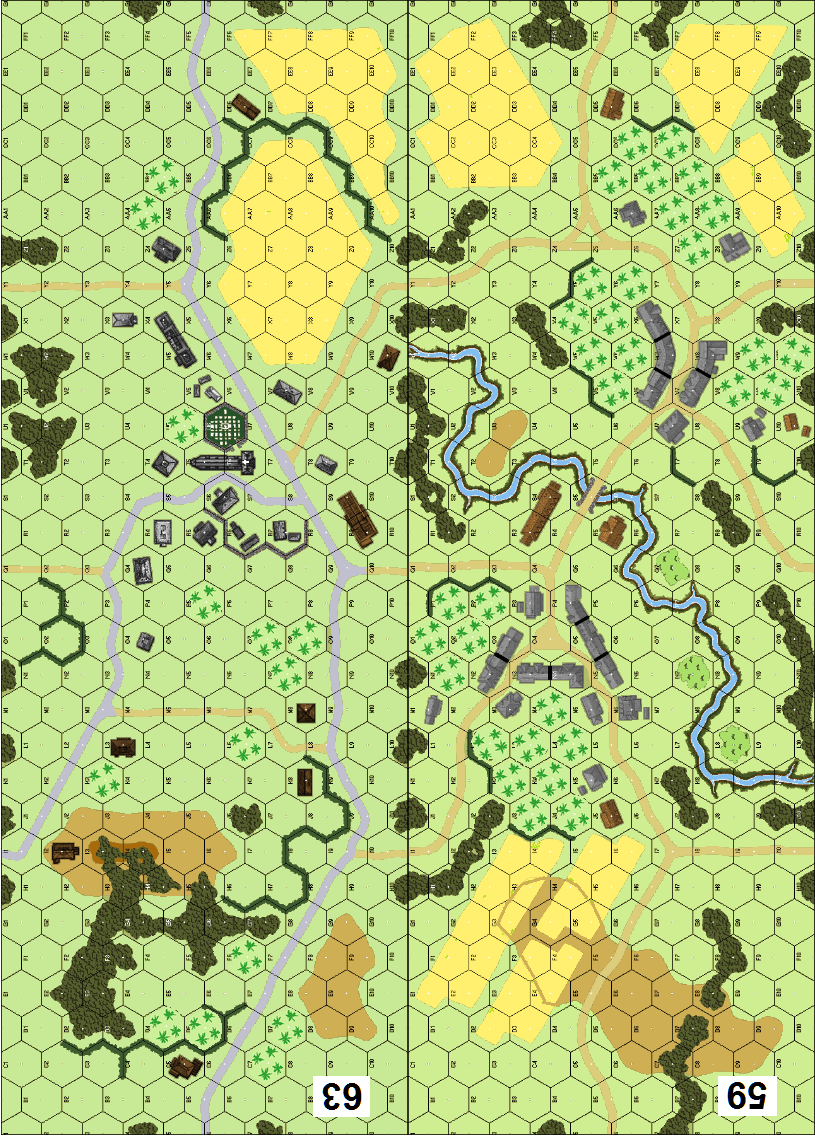
| Map Board(s): |
| Overlays: | NONE |
Errata (source)
Players wanting to play this game/Request a match:
Scenario info
Last Played:
View all or balance report
| Action | Date |
|---|---|
| hoxson1 Linked the scenario to ROAR | 2024-09-24 22:22:26 |
| hoxson1 Modified the Attacker's Guns | 2024-09-24 22:21:51 |
| hoxson1 Modified the unit counts | 2024-09-24 22:21:50 |
| usmcwo1 Added a playing | 2023-03-10 20:49:06 |
| Bongiovanni Added a playing | 2023-02-28 12:22:10 |
| File | Description | User | Views |
|---|---|---|---|
| (!jap-usa.png) | Image | hoxson1 | 1750 |
| "The fight at Baliuag, December 31, 1941", Howard Gerrard (baliuag fight art.png) | Image | hoxson1 | 1808 |
| (baliuag battle map.png) | Image | hoxson1 | 1789 |
| VASLMap (SP213-VASLMap.png) | Map Image | bkemp01 | 1890 |
| (mighty_fall_PTOish.png) | Map Image | hoxson1 | 1674 |
| Description | Uploaded by |
|---|
| Title | Author | Date |
|---|
| Description | Uploaded by |
|---|
Quick Map View
Location
Not found
Images
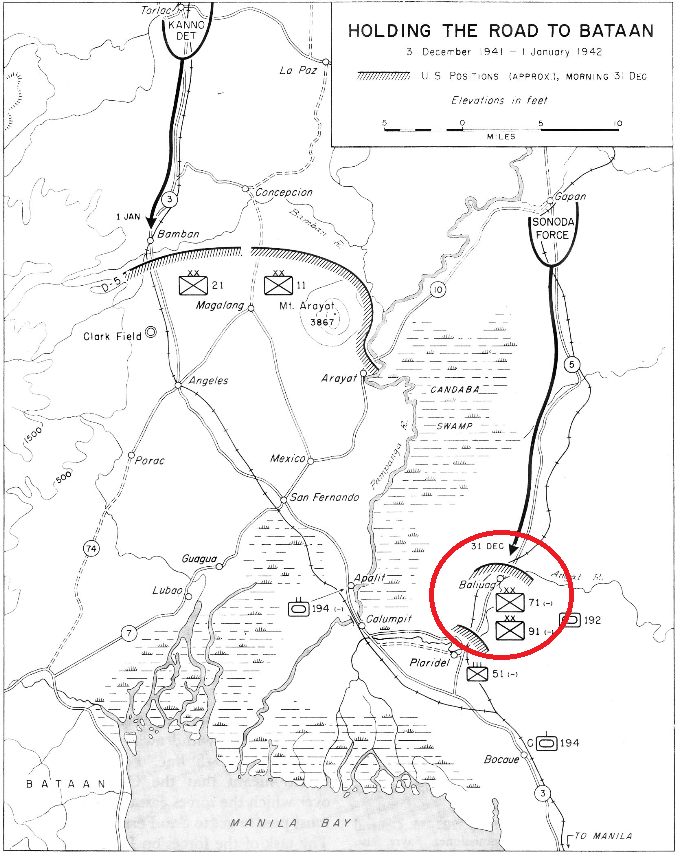

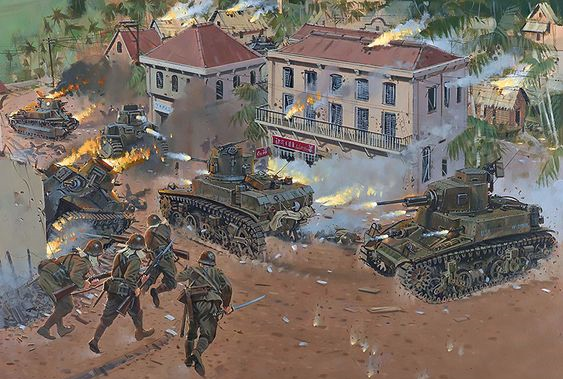
"The fight at Baliuag, December 31, 1941", Howard Gerrard
| Statistics: | ||
| Avg Rating: 6.50 | Votes: 6 | Views: | 5308 |
| To-Play list count: | 0 | |
| Estimated Play time: | 5.7 hours | |
| Recorded Games: | 9 | |
| Archive recorded plays: | ||
| Japanese | 7 | |
| American | 2 | |
| Drawn: | 0 | |
| ROAR Data: (as of today) The Mighty Have Fallen [Confirmed] |
| [A] American | 10 |
| [D] Japanese | 19 |