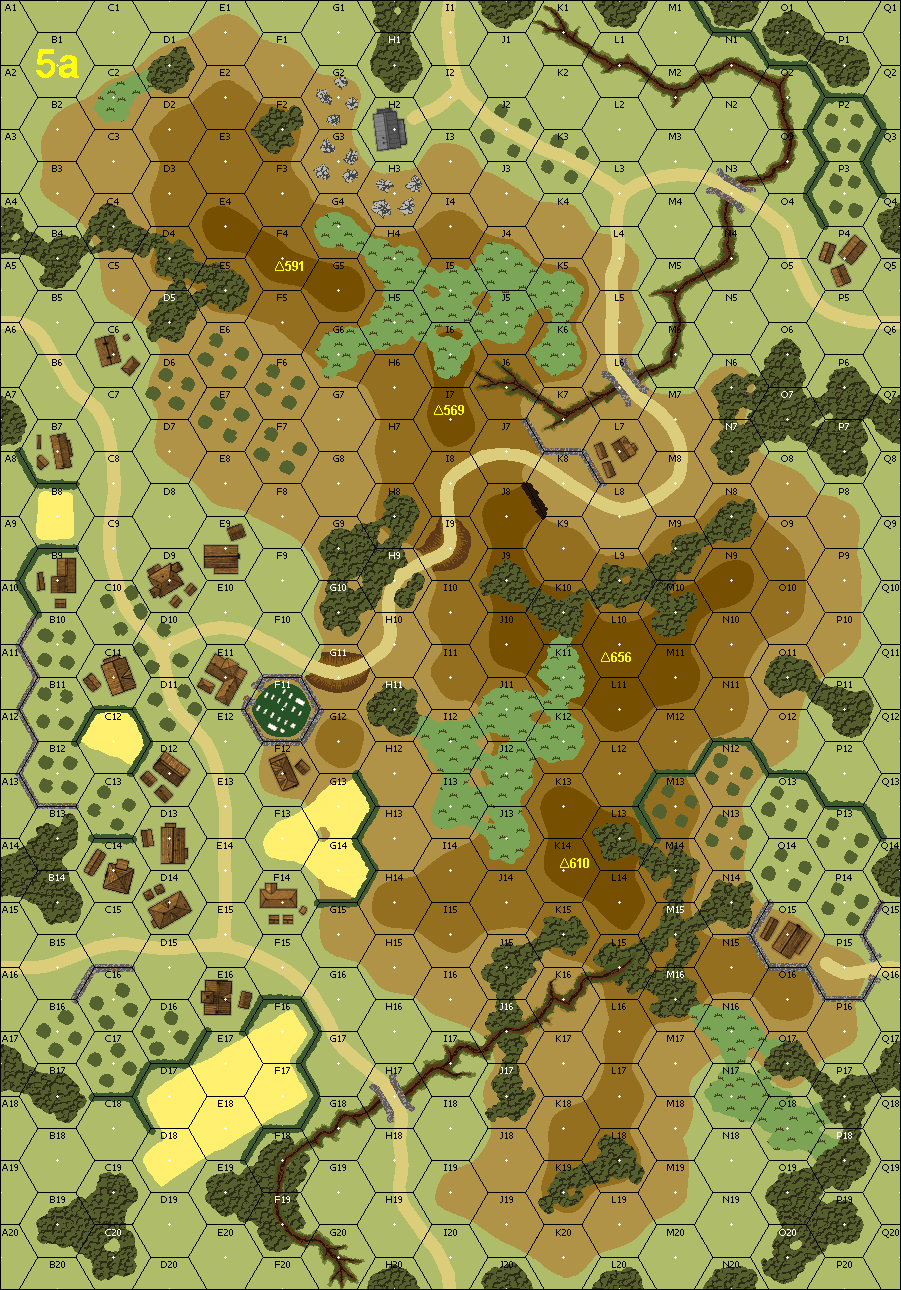
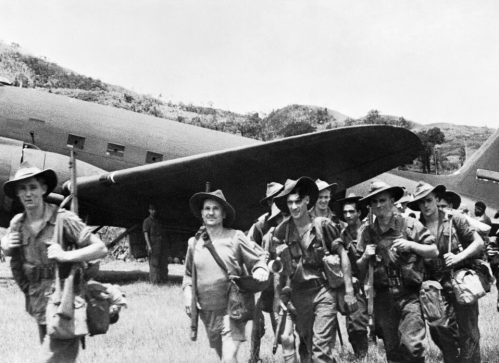
The Japanese offensive at the strategic location of Wau had been slowed through a rearguard effort at the nearby village of Wandumi. Once a Japanese regimental battle group, the Okabe Detachment, had finally amassed at Wau, they attempted to capture the Australian airfield near the Bulolo River. The Australians narrowly averted this assault by flying in reinforcements from 17th Brigade as the Japanese launched their final assault on the strip. However, the Japanese still commanded the heights overlooking the approaches to Wau and the key airstrip. The newly arrived members of 2/7th Battalion, experienced at desert warfare, were now ordered to capture a ridge overlooking the main road.
Attacker: Australian (C Company, 2/7th Battalion, 17th Brigade, Kanga Force)
Defender: Japanese (102nd Regiment, Okabe Detachment)
Well, my Australian tactics were good, but I can't survive breaking all three of my mortars in the first game turn (two subsequently eliminated by rolling back-to-back sixes while trying to repair them---the third remained broken and eventually abandoned), breaking my distant kill stack to 1FP IJA attacks, and two consecutive PFPhs with only two pin results. I withdrew after my turn four RPh. Fun scenario, fun opponent. If I were one that played scenarios again, I'd gladly replay this one.
2024-05-14
(D) Ian Morris
vs
Martin M
Japanese win
Aussies couldn’t pass a MC, opponent conceded. Not one of the great scenarios we thought, if Japanese can hold onto their Concealment, then it becomes very tough to wrinkle them out.
2023-11-19
(A) Asad Rustum
vs
Mikael Strand
Japanese win
Supporting Fire 2023 Round 5
2023-10-03
(D) Andy Beaton
vs
Ed Beekman
Japanese win
ASLOK 2023
2022-06-24
(D) Paul Legg
vs
Joel Ayres
Japanese win
Double One - Mini Round two.
Rolled for sides and ot the Japanese. The Australians were unable to exploit their early smoke which then abandoned them for later in the game. My Japanese managed to hold the eastern hill strongly with the help of the reinforcements.
2022-02-20
(D) Rob Schmitt
vs
Paul Works
Australian win
I played Japanese Defender. I set up the defense with units on all three hill tops which were the Victory point locations. Heaviest defense was in center. 3rd Turn reinforcements went to the west side. Commonwealth conducted a methodical attack with I was unable to serious break up by my MGs and squads. Attacker made excellent use of smoke to prevent my MGs from effective use throughout game. Game was close in the end, but attacker won on the last turn. All Japanese squads in center and east were eliminated. I had two squads left in the west, but he locked them in melee which made them “not in good order”.
2022-02-20
(A) Paul Works
vs
Robert Schmitt
Australian win
2021-11-24
(A) Stephen dedier
vs
David Reenstra
Australian win
Managed to keep the Australians together and push up a gap in the Japanese defenses. Smoke was prevalent and the Aussies managed to initiate a lot of CC attacks keeping the H-H advantage of the Japanese out of play for the most part.
We both missed the entry side of the Japanese and Dave brought them on in the East instead of the North making the Central hill easier for the Aussies to clean off (and a couple good CC rolls helped).
In the end the Aussies overwhelmed the remaining Japanese for the victory. Dice were in my favor and too many Australian squads that came back with ease.
2021-11-23
(D) Jeff B
vs
Alex Koestler
Australian win
5.25 hrs
The Aussies chose a strong push right up the gut, leaving me feeling a bit naked and exposed, and with one less precious leader (9-1). Next turn saw me lose a broken MMG for good as I tried as best I could to scamper higher into the hills. But the Aussies had already taken one victory hex in K13, a hex which would later prove to be their key to victory. My mid-game reinforcements all went to try and support this area, The Aussies would suffer many breaks along the way, but in the end they just had too many units that could easily rally back and get back into the fight. This was by far my favorite scenario from AP16 that I've played, though that is not exactly high praise.
2021-10-17
(D) Vilis Pavulans
vs
Matias Dahlbäck
Japanese win
A pretty fast attack with a few broken ANZAC squads and a pin. A fantastic opportunity to kill loads of ANZACs appeared as a believed dummy was actually a japanese squad, advancing in on exhausted and broken troops. Despite almost impossible odds the japanese filed the ambush and got killed. That happened more times during this great scenario. The ANZAC noose tightened around the central hill where the last japanese survivors held out. In the end a lone japanese squad in a foxhole in djungle with the 9-1 leader held out against ANZAC fire from all directions and won the ambush and managed to infiltrate out into a unguarded victory hex, snatching the victory from the ANZACs on a single die roll.
2021-06-20
(A) Dave Mareske
vs
Will Willow
Japanese win
Texas Team Tournament
2021-04-16
(A) Eric Partizan Eric
vs
Australian win
2021-03-28
(A) Dave Mareske
vs
Paul Works
Japanese win
Round 3 of March Madness, Semi-Finals. A hard fight for the Australians. They got lots of smoke in the first turn and the 76 MTR never did run out of smoke, though it was misplaced as I forgot Jungle was a two level obstacle...it still did its job in taking the left flank. The middle turns were spent taking up positions on the right and left flanks with a kill stack in position in the middle. Paul rolled a "2" on my kill stack and broke everyone and pretty much took out the rest of my attack. The final turns were spent in some desperate moves trying to get the middle hill, most failed. Good game, will like to try this one again someday.
2021-03-28
(D) Paul Works
vs
Dave Mareske
Japanese win
I set up strong along the central ridge with a light, layered defense along the two flanks. Dave made a balanced attack across the front, somewhat more heavily in the center. As he noted, he had set up his 76mm MTR out of LOS from the central ridge, but could still cover the ridge on my right side. As he made his attack, I had a line of squads behind the central ridge begin digging foxholes in a reverse slope defense that also doubled as positions in VC hexes. His attack on my left stalled when it hit my second line; although he was helped by rolling a 2 in a CC... he pushed up the center with large stack to put pressure there; however, he ran into my MMG and a couple squads - who proceeded to get a nice ROF run and break up the stack. His reinforcements came in on my right nd rolled up that side, but i was able to attrit a a squad and wound a leader. As he pushed up for his final effort, I was able to fight hi off in the center and was able to actually counter-attack to retake the ridge on my left. Dave is always fun to play; good game.