Dash for the Stairs PTO (id:#65877)
Manila, Luzon, Philippines
1945-02-26 (18 others)
HS29: Obstinate Canadians (HSASL 2 - Operation Veritable)
HS30: The Good Shepherd (HSASL 2 - Operation Veritable)
MLR 3: Mooshof Melee (Maple Leaf Route # 2.1)
UV 2: Agony, Ateball and Angel (Uncommon Valor)
FE 61: Armored Cavalry (Fanatic Enterprises: Internet)
: Compagnie D'Honneur (Journal du Stratège # 37)
MLR 3: Mooshof Melee (Canada at War)
CAW10: Shooting Like Mad (Canada At War 2)
MLR 3: Mooshof Melee (View From the Trenches # 33)
RPT53: Tiger Blood (Rally Point # 6)
MLR03: Mooshof Melee (Elite Canadians)
PK 4.2: Armored Cavalry (Coastal Fortress)
GJ016: Fireball (Grumble Jones)
GJ047: Ateball (Grumble Jones)
RPT121: Fireball! (Rally Point #13)
CtR-21: The Gates of Hell (Corregidor: The Rock)
SF23: Iwabuchi's Sarcophagus (HASL 11 - Sword & Fire: Manila)
J256: Mortal Wounding (ASL Journal #15)
Designer: David Roth
Starter kit scenario?: Deluxe scenario?:
Balance:
AmericanJapanese
Overview:
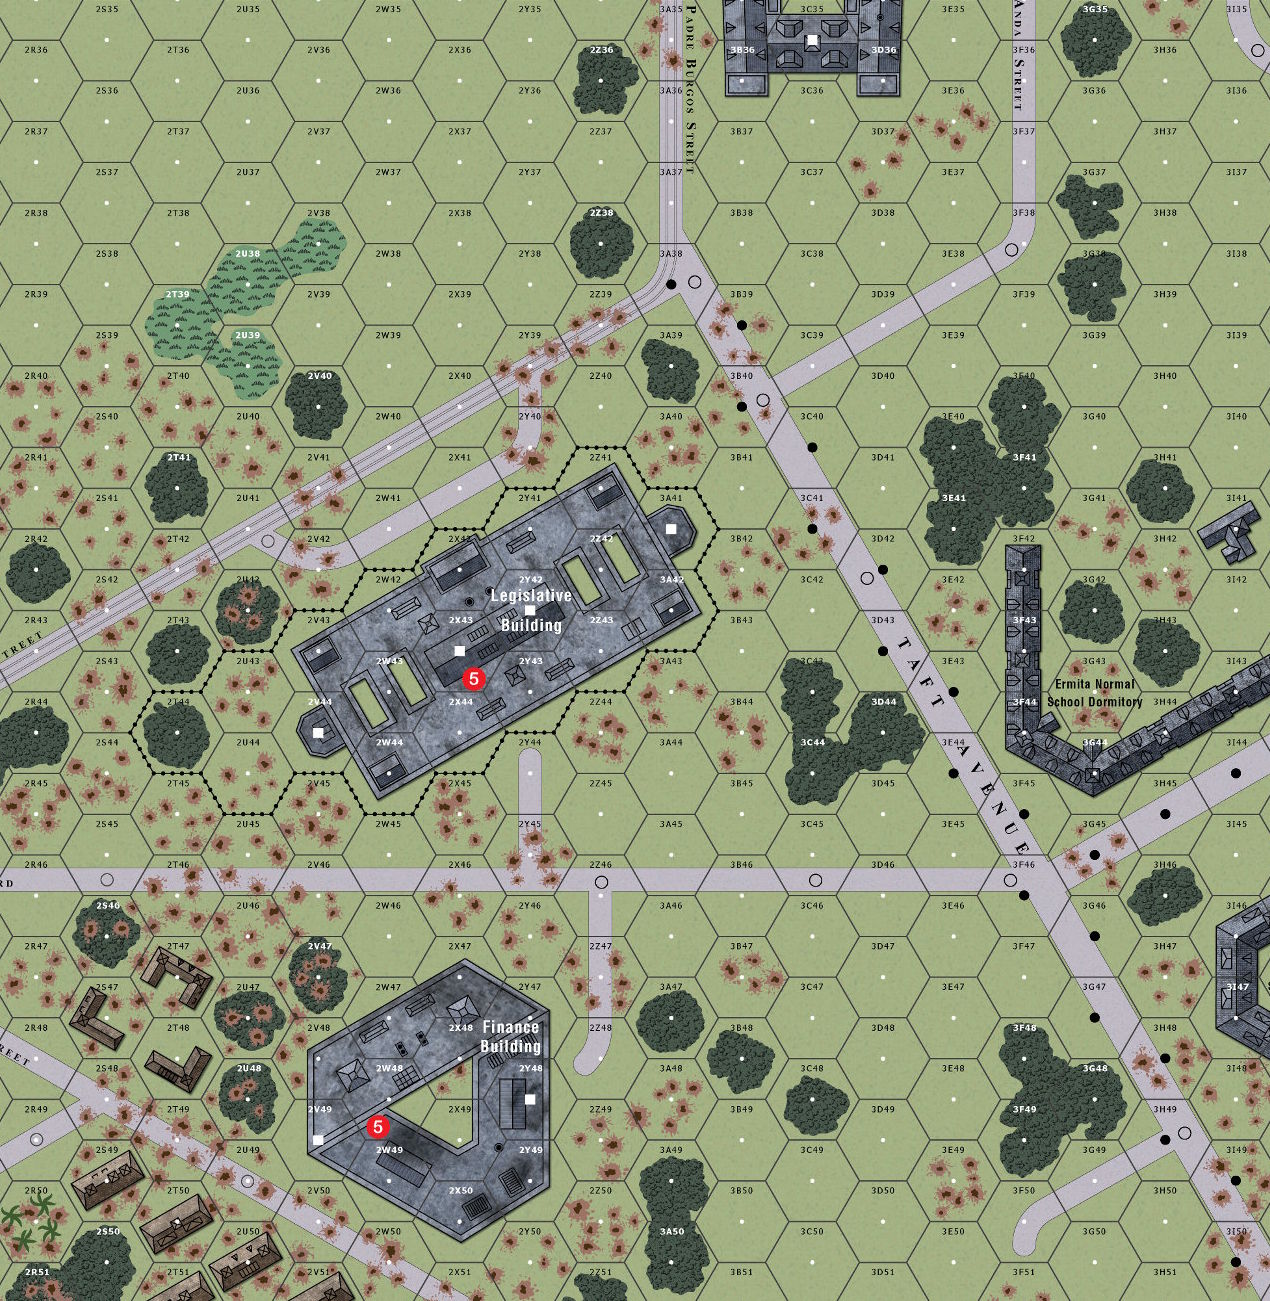
Private First Class Cleto Rodriguez's actions fighting at the Paco Railroad Station just fifteen days earlier would earn him a nomination for the Medal of Honor. Now, once again, he would be called upon to display valor far beyond what was expected. During one of the several attempts to penetrate the Legislative Building, Rodriguez and fifteen other soldiers of his platoon fought their way into the large open foyer of the building. Very soon, the magnitude of firing outside was nothing compared to the intensity inside. It seemed as if every Japanese in the place was shooting at them. With little in the way of available cover, the Americans faced certain death. Rodriguez loaded a full magazine into his BAR, fired off several rounds then stood and yelled "Follow me!" as he led the charge towards the spiral staircase on the other side of the debris-covered tile floor.Attacker: American (Company A, 2nd Battalion, 148th Infantry Regiment, 37th Infantry Division)
Defender: Japanese (5th Naval Battalion and attached units.)
6.5 turns
Players: 2 OBA: None Night: No| Unit Counts: |
| Squads: A:11.0 D:11.0 |
| AFVs: A:0 |
| AFVs: D:0 |
| Guns: A:0 D:0 |
| Misc Rules: | D: Fortified Building (B23.9), A: Units in 2Y42 are Fanatic (A10.8) |
| Map Board(s): |

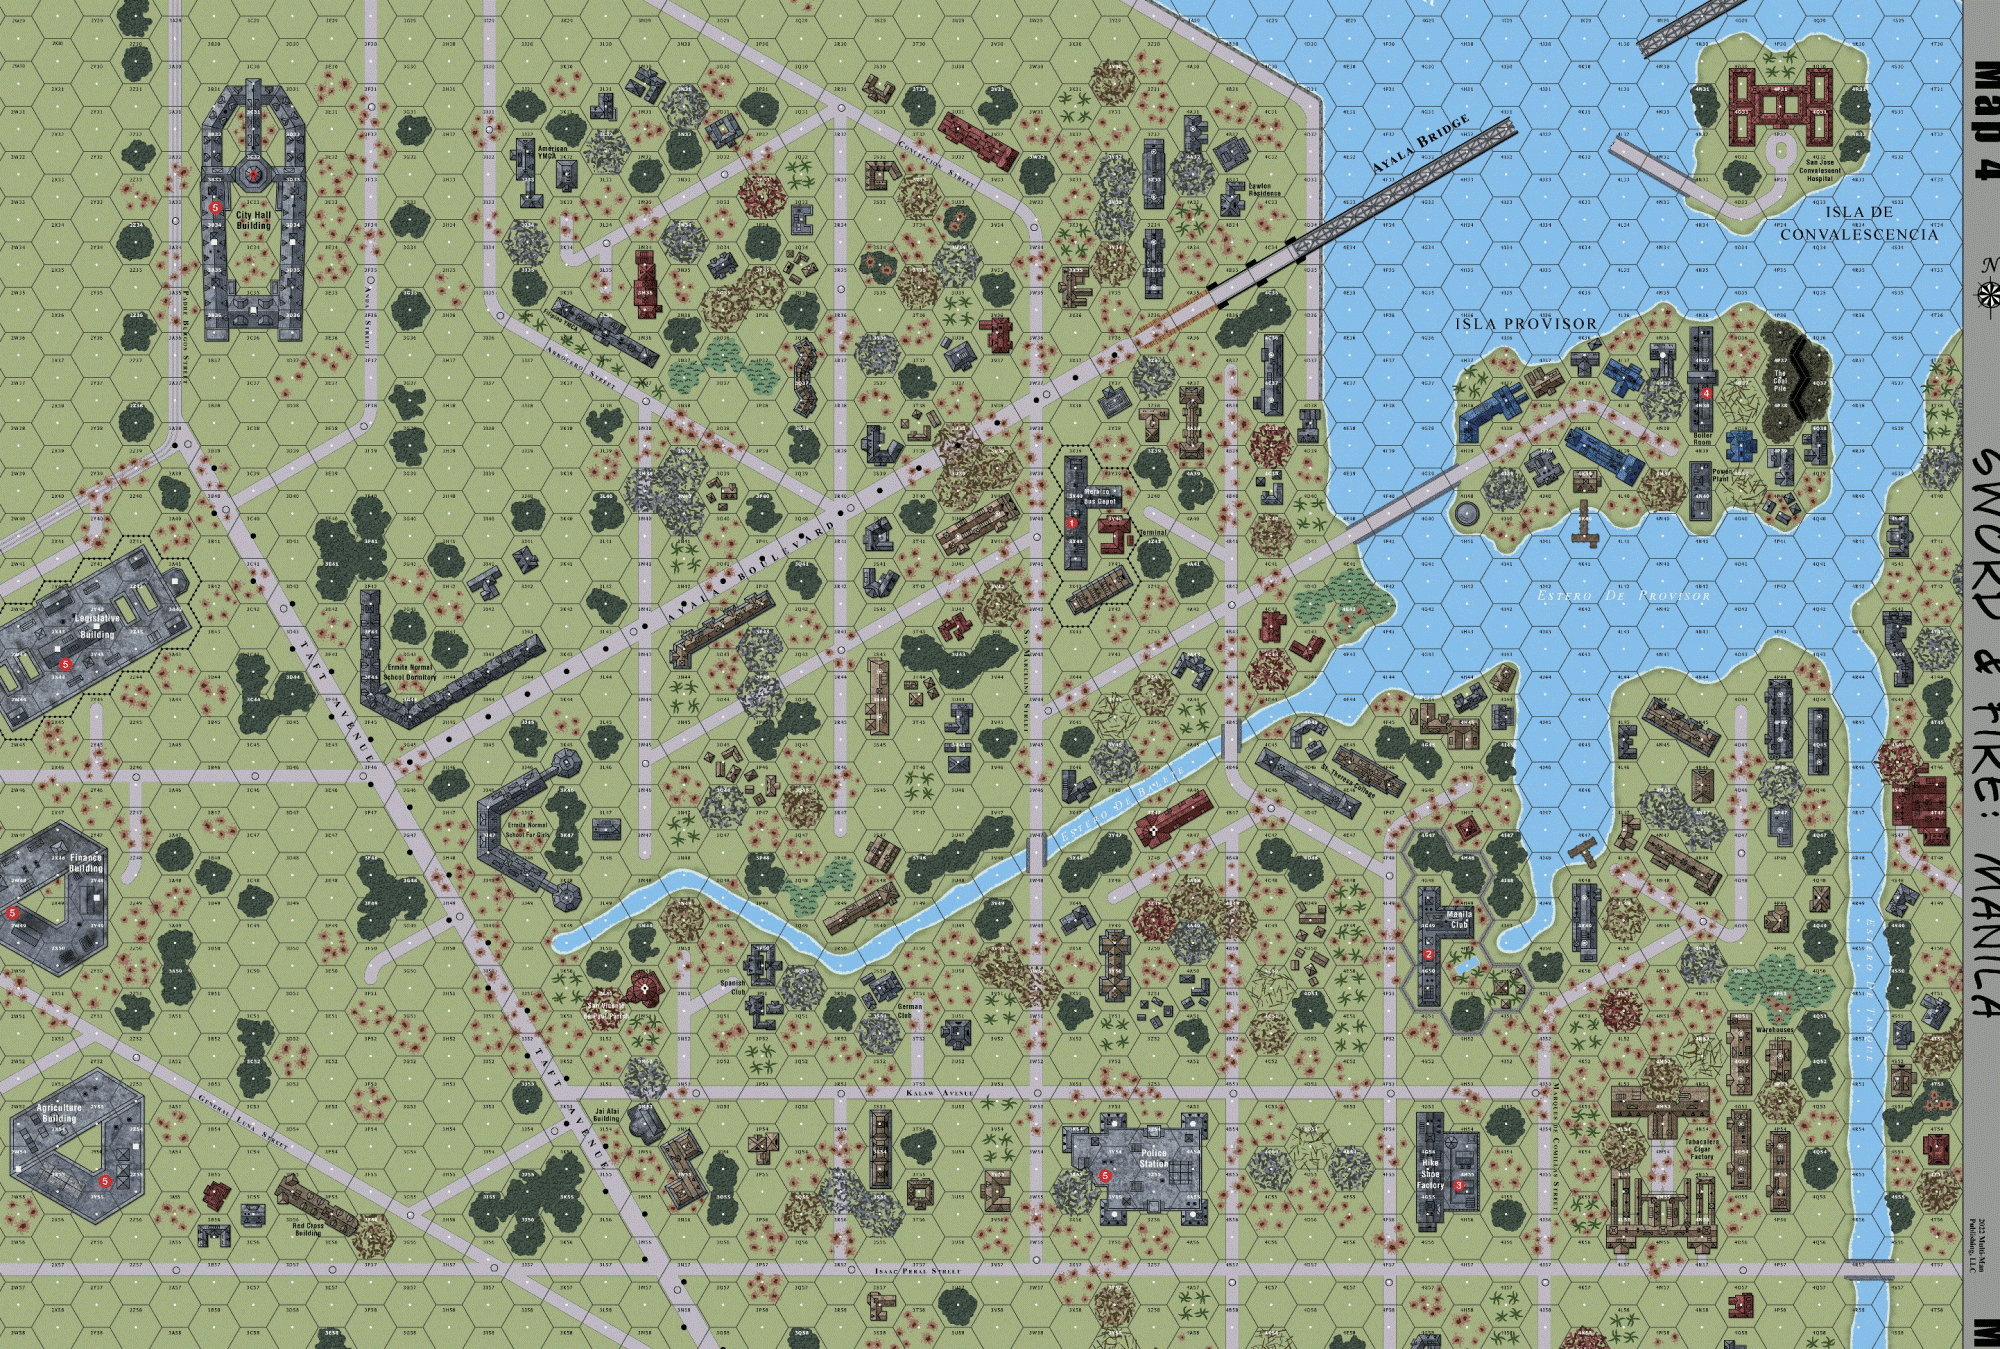
| Overlays: | NONE |
Errata (source)
Players wanting to play this game/Request a match:
Scenario info
Last Played:
View all or balance report
| Action | Date |
|---|---|
| Kydder Added a playing | 2026-02-22 00:28:30 |
| Kydder Rated the scenario | 2026-02-22 00:23:25 |
| buser333 Added a playing | 2026-02-02 23:04:39 |
| aokigaryou Modified the unit counts | 2025-11-10 06:05:07 |
| aokigaryou Uploaded the Board image | 2025-09-23 09:32:02 |
| File | Description | User | Views |
|---|---|---|---|
| (!usa-jap.png) | Image | hoxson1 | 1209 |
| (SF24map.jpg) | Map Image | aokigaryou | 520 |
| Description | Uploaded by |
|---|
| Title | Author | Date |
|---|
| Description | Uploaded by |
|---|
Quick Map View
Location
Images

| Statistics: | ||
| Avg Rating: 7.14 | Votes: 7 | Views: | 0 |
| To-Play list count: | 1 | |
| Estimated Play time: | 3.3 hours | |
| Recorded Games: | 3 | |
| Archive recorded plays: | ||
| American | 0 | |
| Japanese | 3 | |
| Drawn: | 0 | |
| ROAR Data: (as of today) Dash for the Stairs [Log in to Confirm or Edit] |
| [A] American | 4 |
| [D] Japanese | 4 |