Totensonntag ETO (id:#65281)
Janowice, Poland
1939-09-10 (3 others)
FrF45: Totensonntag (Friendly Fire Pack 6)
#4: Run, Run, Run (Freedom's Price - Poland 1)
SP289: Piatek Push (Schwerpunkt #25)
#4: Run, Run, Run (Freedom's Price - Poland 1)
SP289: Piatek Push (Schwerpunkt #25)
Designer: Mattias Rönnblom
Starter kit scenario?: Deluxe scenario?:
Balance:
PolishGerman
Overview:
After a week of war, the German invasion of Poland ran according to plans. German troops of the 8. Armee were marching eastward on Warsaw, and on the other side of the Bzura river were Polish troops withdrawing in the same direction. Stretched along the Bzura, protecting the army's flank, was the 30. Infanterie-Division. On the morning of 9 September, the Polish Knoll-Kownacki Operational Group launched a large-scale assault across the Bzura. For the first (and would it prove later, only) time during the 1939 conflict the Poles mounted an offensive.Attacker: Polish (57th Infantry Regiment, 14th Infantry Division)
Defender: German (I. Bataillon, Infanterie-Regiment 26, 30. Infanterie-Division)
6.5 turns
Players: 2 OBA: None Night: No| Unit Counts: |
| Squads: A:11.5 D:8.0 |
| AFVs: A:0 |
| AFVs: D:0 |
| Guns: A:0 46mm Granatnik wz. 36 MTR D:0 5cm leGrW 36 |
| Misc Rules: | A: Elite and 1st Line squads Assault Fire capable |
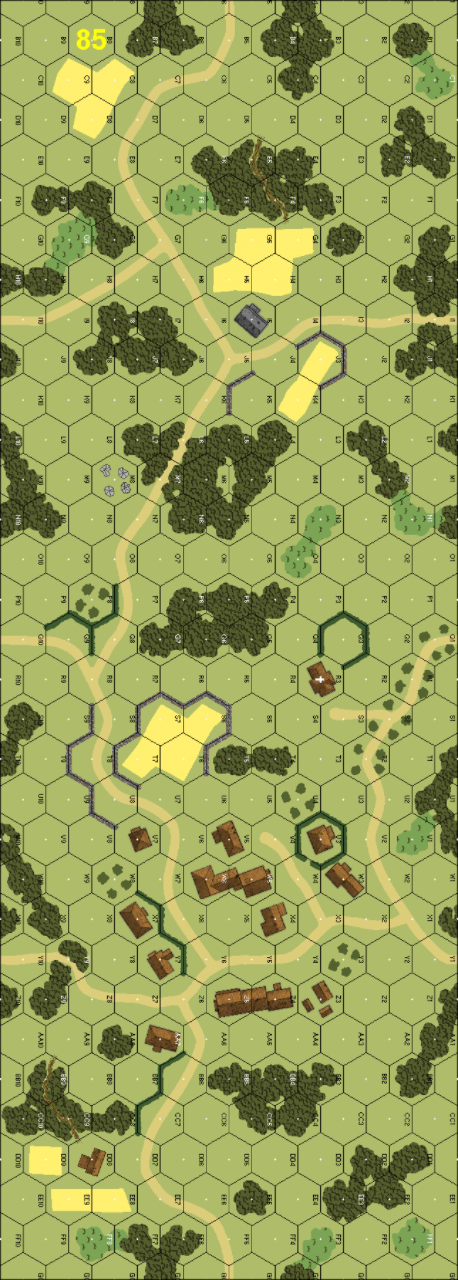
| Map Board(s): |
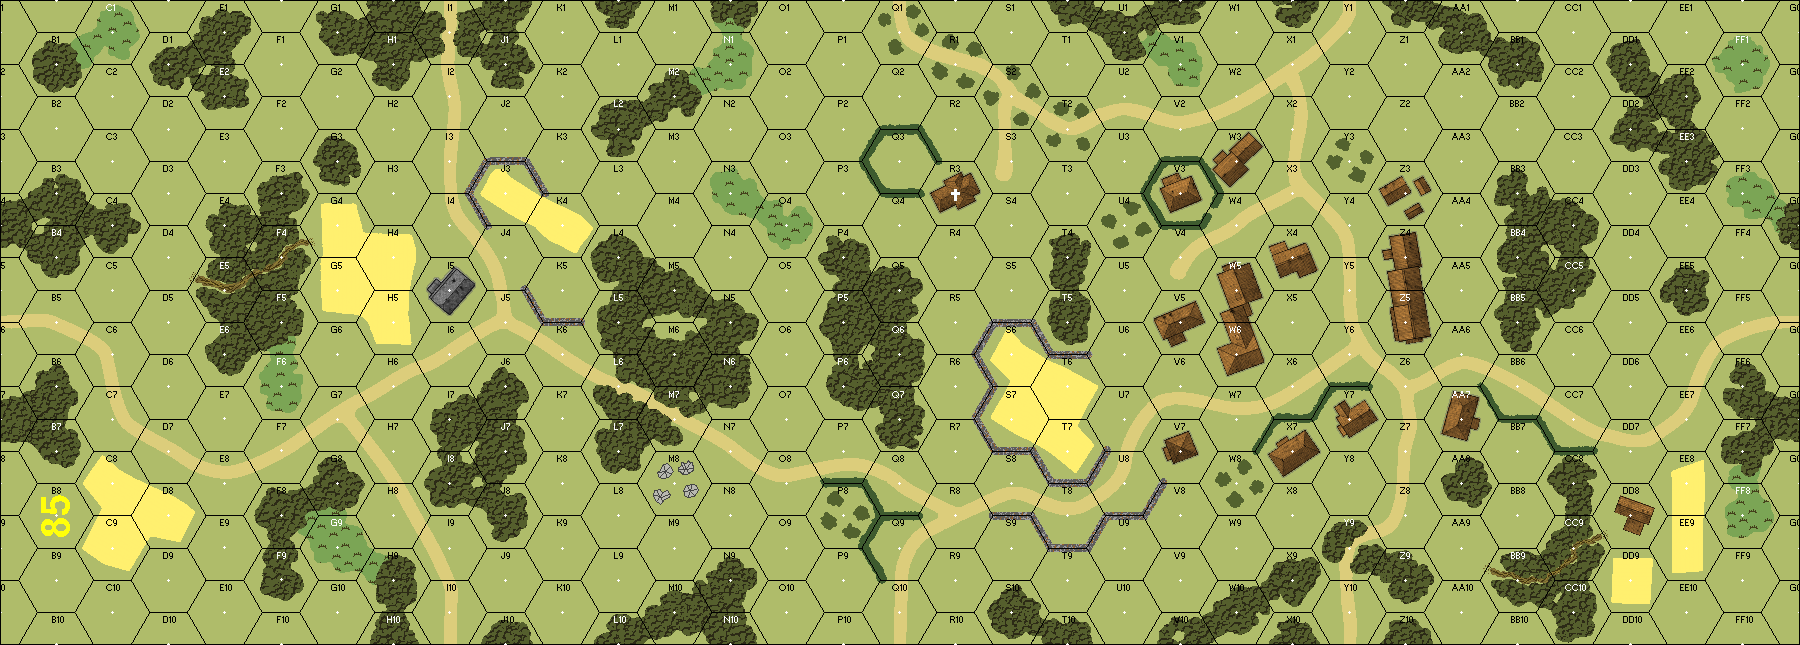
| Overlays: | NONE |
Errata (source)
Players wanting to play this game/Request a match:
Scenario info
Last Played:
View all or balance report
| Action | Date |
|---|---|
| slunts Added a playing | 2026-07-06 01:58:52 |
| FMFCB Added a playing | 2026-04-21 23:30:51 |
| Guru Bob Added a playing | 2025-11-04 16:06:56 |
| jwert02 Added a playing | 2025-02-09 21:35:18 |
| strategos Added a playing | 2025-02-01 21:33:57 |
| File | Description | User | Views |
|---|---|---|---|
| Scenario setup (BoF13 Totensonntag.vsav) | VASL Setup | MoriQuessir | 1737 |
| (pole-germ.png) | Image | hoxson1 | 1557 |
| VASL Log file (BoF13 Totensonntag_Fedor(P)_Dmitry(G).vlog) | VASL Game Log | MoriQuessir | 1767 |
| VASL Log file (BoF13 Totensonntag_Stew(G)_Dmitry(P).vlog) | VASL Game Log | MoriQuessir | 1853 |
| (Totensonntag map.png) | Map Image | hoxson1 | 1472 |
| Description | Uploaded by |
|---|
| Title | Author | Date |
|---|
| Description | Uploaded by |
|---|
Quick Map View
Location
Images

| Statistics: | ||
| Avg Rating: 6.91 | Votes: 43 | Views: | 0 |
| To-Play list count: | 2 | |
| Estimated Play time: | 2.9 hours | |
| Recorded Games: | 40 | |
| Archive recorded plays: | ||
| Polish | 20 | |
| German | 17 | |
| Drawn: | 2 | |
| ROAR Data: (as of today) Totensonntag [Confirmed] |
| [A] Polish | 36 |
| [D] German | 25 |