Sparrow Force PTO (id:#65402)
Oesau, West Timor
1942-02-22 (8 others)
BO 1: Usau Ridge (Breakout! # 42)
SP117: Stranded Cats (Schwerpunkt #10)
SP127: Bleed Gurkha Bleed (Schwerpunkt #11)
VB16: This Monkey's Gone to Heaven (Volfoni Brothers Scenarios)
AP92: End of the Beginning (ASL Action Pack # 9 To the Bridge!)
J234: Buckley's Chance (ASL Journal #14)
J230: Battle for Babau (ASL Journal #14)
J234: Buckley's Chance (ASL European Union Championship 2024)
Designer: Andrew Rogers
Starter kit scenario?: Deluxe scenario?:
Balance:
AustralianJapanese
Overview:
Following Pearl Harbor, the Japanese attacked key locations in Asia, including Hong Kong, Malaysia, and Singapore. The islands of Java and Sumatra contained key raw materials and bases and also formed part of the Japanese expansion plans. Leading the southern attack were men of the Eastern Detachment, commanded by General Takeo Ito. Many of Ito's soldiers were veterans of the Chinese battlefields. The islands of Timor and Ambon helped connect Java and Sumatra to the Australian mainland via air, so the Japanese needed to secure the former pair before invading the latter. An Australian reinforced battalion, known as Sparrow Force, was the main Allied defensive unit in Timor. To help dislodge these ANZACs. The Japanese paratroopers from the 3rd Yokosuka SNLF landed behind Australian lines attempting to seize the main airfield.Attacker: Australian (B Company, 2/40th Battalion, "Sparrow Force")
Defender: Japanese (2 Company, 228th Infantry Regiment and 3rd Yokasuka Special Naval Landing Force, Eastern Detachment)
5.5 turns
Players: 2 OBA: None Night: No| Unit Counts: |
| Squads: A:14.0 D:12.0 |
| AFVs: A:0 |
| AFVs: D:0 |
| Guns: A:0 OML 2-in. Mortar x 3 D:1 Type 92 70mm INF Gun Type 89 Heavy Grenade-Launcher |
| Misc Rules: | PTO Terrain (G.1), LJ (G2.1) Huts (G5.6) N/A, NQ (A20.3) in effect. A: one banzai allowed |
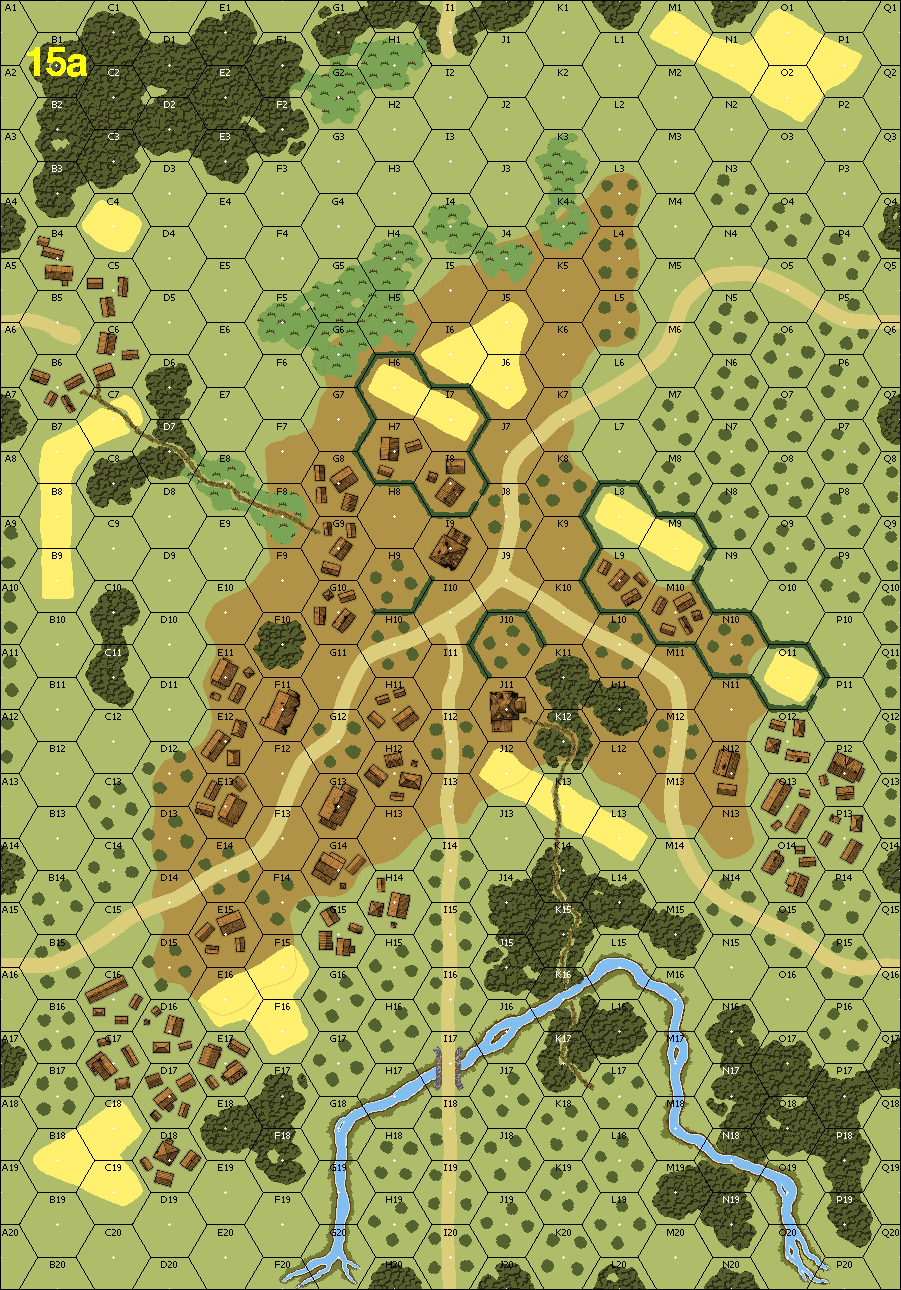
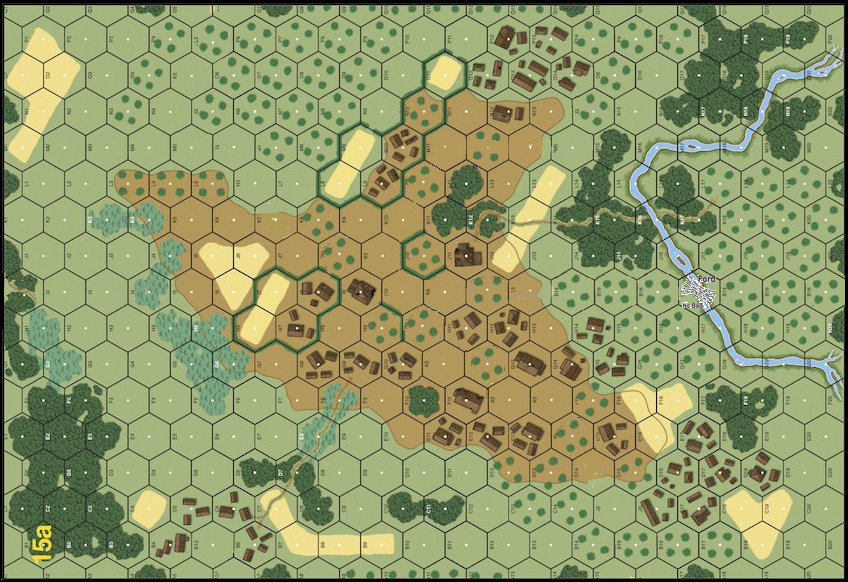
| Map Board(s): |
| Overlays: | NONE |
Errata (source)
Players wanting to play this game/Request a match:
Scenario info
Last Played:
View all or balance report
| Action | Date |
|---|---|
| Hutch Modified the gps location | 2025-02-21 16:45:30 |
| Boogaboo Added a playing | 2024-04-06 23:34:10 |
| aiabx Added a playing | 2024-01-05 05:34:20 |
| mtrodgers99 Added a playing | 2023-08-13 23:57:57 |
| Hutch Modified the overview | 2023-05-26 14:18:08 |
| File | Description | User | Views |
|---|---|---|---|
| (auss-jap new.png) | Image | hoxson1 | 1571 |
| (sparrow force map.png) | Map Image | hoxson1 | 1613 |
| Description | Uploaded by |
|---|
| Title | Author | Date |
|---|
| Description | Uploaded by |
|---|
Quick Map View
Location
Images

| Statistics: | ||
| Avg Rating: 6.55 | Votes: 22 | Views: | 0 |
| To-Play list count: | 2 | |
| Estimated Play time: | 3.4 hours | |
| Recorded Games: | 21 | |
| Archive recorded plays: | ||
| Australian | 7 | |
| Japanese | 13 | |
| Drawn: | 0 | |
| ROAR Data: (as of today) Sparrow Force [Confirmed] |
| [A] Australian | 19 |
| [D] Japanese | 31 |