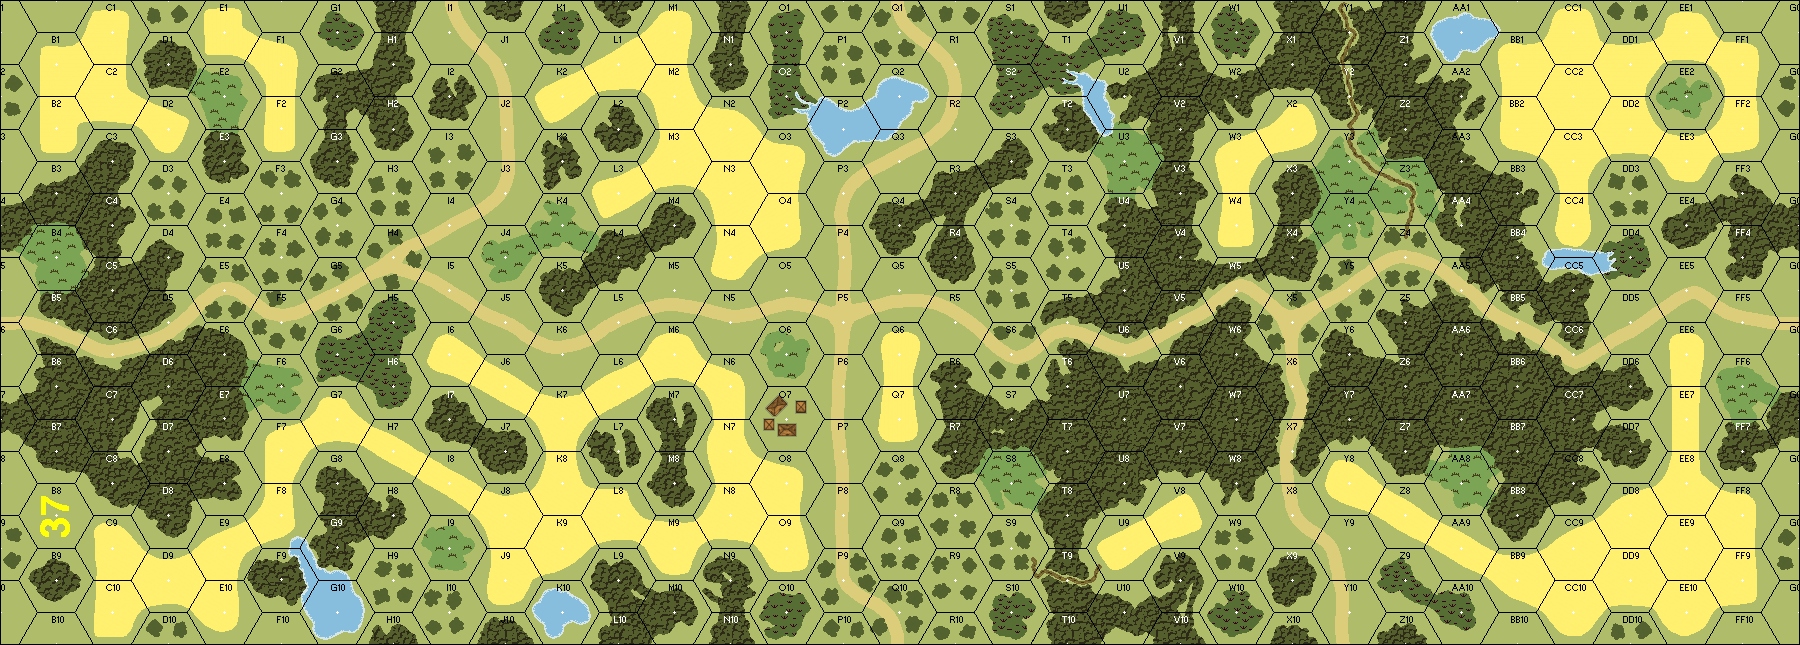
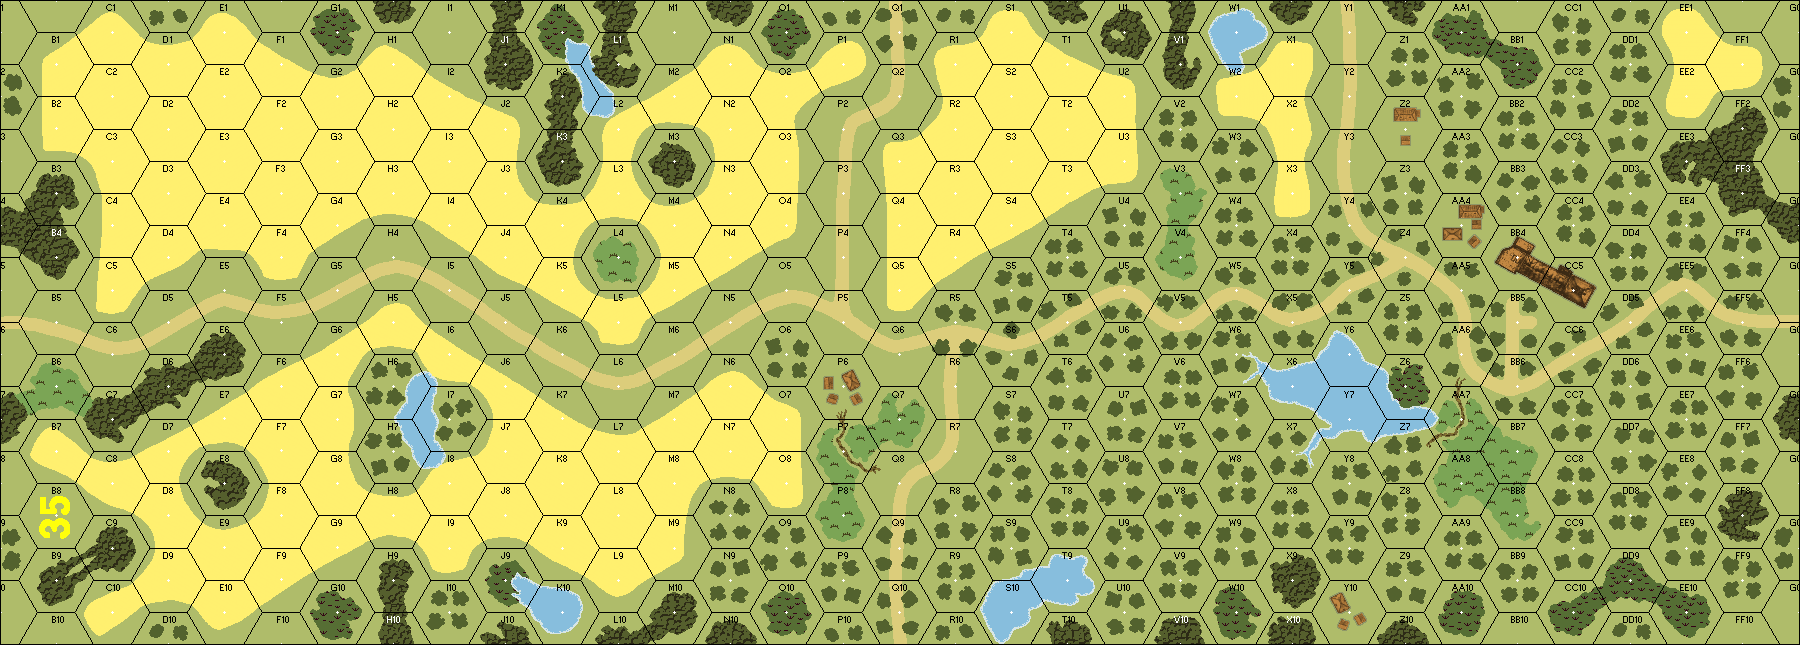
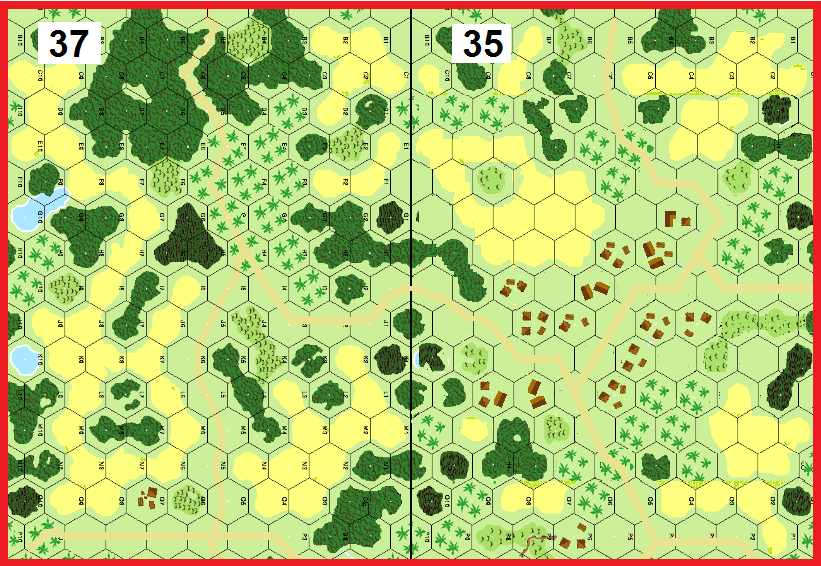
General Corlett, 7th Infantry Division commander, ordered an early morning attack on 2 February. Thick vegetation prevented the Americans from knowing the full details of the defensive works. Japanese strong points had been constructed behind the beaches as sort of a second line, as well as around the airfield. Additionally, Rear Admiral Monzo Akiyama had attached tanks of the 2nd Battalion, 1st Amphibious Brigade dispersed throughout the islands rather than as a concentrated force. This brought the Type 2 and 3 amphibious tanks into the defense.
Attacker: American (Elements of 7th Infantry Division)
Defender: Japanese (Elements of 6th Naval Base Defense Force)
7 turns
Players: 2 OBA: None Night: No
Unit Counts:
Squads: A:18.0 D:13.0
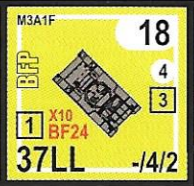
AFVs: A:4
M4 x 2 M3A1F x 2
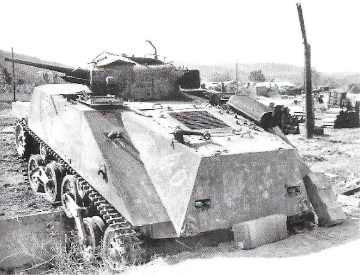
AFVs: D:2
Type 2 KA-MI Type 3 Ka-Chi
Guns: A:0 D:2
Type 88 7.5cm Mobile Field High-Angle Gun Type 96 25mm AA Gun Twin-Mount Type 89 Heavy Grenade-Launcher
Thinking it would be too obvious to attack up the road, and that the I5-P5 road would be well-defended, I chose to bring all my units in heavy NW. It would take a bit longer to get the tanks in position, but my plan was to create TBs through the thin jungle and have my infantry clear the way for them. I was very wary of all the tricks the Jap defenders could have up their sleeves, and was pleasantly surprised when this approach seemed to be very lightly defended. I was even more surprised when my men broke clear of the jungle and pushed more toward the center of the board, still running into nothing scary. Let's be fair, the Japs have a pretty weak force compared to the Amis, with half of it composed of 2nd liners and conscripts, and the Amis have a lot of toys and their massive firepower. It is a tough VC though in the time allotted, and any hiccup could be enough to slow me down just enough. I was happy to see the sole Jap mortar fall to pieces on Turn 3, and a bit relieved when Scott revealed the first gun (the 75mm AA). I saw my first casualty on Turn 4, in the form of one of the FT tanks charging the gun, while an M4 stumbled upon one of the PBs while scouting ahead, but I continued to swat the Jap defenders like mosquitos. I grabbed my first two buildings. The PB occupant became a bit of a nuisance when he took his tunnel to reposition behind my rear. I diverted a tank and some troops to make sure they were dealt with on Turn 5, and the losses mounted on both sides (4 Jap SE and a leader to 1.5 Ami squads), including a boxcar MC on the AA gun crew. I claimed the entire NW side of the street and another building in the south, but the reinforcing Jap tanks knocked out my last FT tank. Other than this, Scott's luck was fairly atrocious all game, and the Japs cannot afford that with all the muscle they face. Turn 6 saw him blow up a tank with a DC hero, but his 10-1 was lost to a mortal wound. I claimed five more buildings, leaving the only one uncaptured the one in the far south. He could've taken a few more American lives, but with the writing on the wall called it day there. A nice and fairly simple scenario.
2024-02-04
(A) walter mcwilliams
vs
Tom Kearney
Japanese win
Made good progress before running into Tom's gunline which stalled my drive toward the village. By turn 5 it was obvious I didn't have the time left to take the required 10 buildings. Very fun scenario balanced to a razor's edge.
2024-02-02
(A) fabio aliprandi
vs
*
Japanese win
2023-05-31
(D) Rich Weiley
vs
Dave Wilson
Japanese win
2021-05-07
(D) Will Willow
vs
Andrew Young
American win
2021-05-04
(D) Richard Jenulis
vs
Paul Chamberland
American win
CASLO XXXV (2021). Worse shellacking in my ASL career. VBM sleazes, no ROF, broken weapons, cowering and casualty reductions. The Americans deployed, deployed, and deployed more. I called the game before the reinforcement came in. They would not have made a difference in the final out come. Paul played flawlessly.
2021-02-16
(D) James Holt
vs
Eric Shipley
American win
This is an action packed scenario with tons of toys for the US and many potential surprises from the Japanese. I defended heavily on the Japanese left with an upfront defense. My 75 was HIP in the forward kunai behind the road with some overlapping fields of fire from the MMGs in a trench with the 10-1 and a pillbox - all connected by trenches to one another and to the second pillbox with LMG. Eric did not oblige me by running tanks in front of the 75. But it was moot. My plans did not consider the possibility of malf'ing the 75 and both MMGs by the end of turn 2. Once the crust was broken, the Japanese could not hold back the US horde. Hidden Tank-Hunter Heroes chocked and only provided some interesting diversion; even with two having ATMM, they choked on the big stage. Flamethrower Stuarts were tough. Both sides took a lot of casualties and it went down to turn 6 after the Japanese reinforcements swarmed into the rearmost buildings. Too many remaining US squads and functioning AFVs earned a concession at the end of Japanese turn 6. Highlights for the Japanese included staying HIP in cover, allowing US squads to pass through and get shot/broken, and then dropping HIP to eliminate them for failure to rout. I would play this again in a heartbeat after paying tribute to the dice gods.
2020-09-26
(D) Rob MacGinley
vs
Ian Willey
American win
USA overwhelmed the IJA
no tricks worked and in reality even tanks driving next to swamps had no trouble
2020-09-26
(D) Rob MacGinley
vs
Ian Willey
American win
Big American unit with lots of punch
IJA have to spread out and be very much in depth
expect to be slowly ground to dust!!
2020-07-17
(A) nathan wegener
vs
Mike Van Hoy
American win
Lost my best 2 leaders and 2 squad equiv to 3 sniper rolls and subsequent LLMCs in my first movement phase!!! Almost conceded but decided to push onward. I was able to flank the Japanese who had fully committed to up front defense. We raced to the village and he was not able to get enough back to prevent an American mob from occupying much of the village. My highlight was executing an overrun of his 75mm AA gun with my FT tank.
2020-05-03
(D) Ron Garcia
vs
Darryl M.
Japanese win
2018-12-27
(D) Paolo Cariolato
vs
Andrea Pagni
Japanese win
2018-04-08
(A) Michael Rodgers
vs
Stan Jackson
Japanese win
Tournament negotiation gave me the Americans with the Japanese balance. I was too conservative with the American tanks. The Japanese kept concealment for the first two turns. I conceded after the American 5th turn, because of time constraints and not enough progress.
2015-10-03
(D) Michael Rodgers
vs
Bill Hayward
American win
I planned a mostly rear area defence with a couple of HIP traps and two hidden THH. Bill’s American ground forward at a decent, but not reckless pace. One HIP THH was able to eliminate a FT tank in CC. Later, when a Sherman moved into a HIP MMC hex, it was able to generate a THH and eliminate the Sherman. That might be a record number of THH kills in one game for me. Twice during the game, I skulked units into hexes that I thought were safe, but were not. Bill made me pay both times. Both snipers were active. Two American leaders died. Both Japanese guns were pinned by sniper attacks at one point. Around turn four, the Americans were taking buildings; things were looking bleak when both my MMG broke, as well as the 75. I told myself I would concede after the Rally phase if nothing repaired. I rolled three ones to repair all three weapons. The following Prep fire, however, accomplished nothing, so could not save the bad situation I was in. I conceded soon after.
2015-05-05
(D) Steve Bowen
vs
RS
Japanese win
Looked like it was going to come down to the wire. But the Japanese rolled all the good rolls on the 2nd to last turn and left the field littered with broken US squads and wrecked vehicles. Great scenario overall.